If you have a room in your home that is concrete, you may be concerned that you’ll be stuck with it. How could you possibly get rid of concrete without spending a fortune? Fortunately, there is a way to install hardwood floors over concrete floors, making your problem virtually obsolete without clearing out your bank account.

The process requires a decent amount of work and some patience, but if you are strategic you can likely complete this project in a few days.
Preparing For Installation
What Tools Will You Need?
- Pry Bar
- Utility Knife
- Level
- Hardwood Flooring
- Chisel
- Rags
- Hammer
- Rubber Mallet
- V-Notch Trowel
- Wood Adhesive (Urethane)
- Moisture Vapor Retarder
Step By Step Guide To Install Hardwood Over Concrete
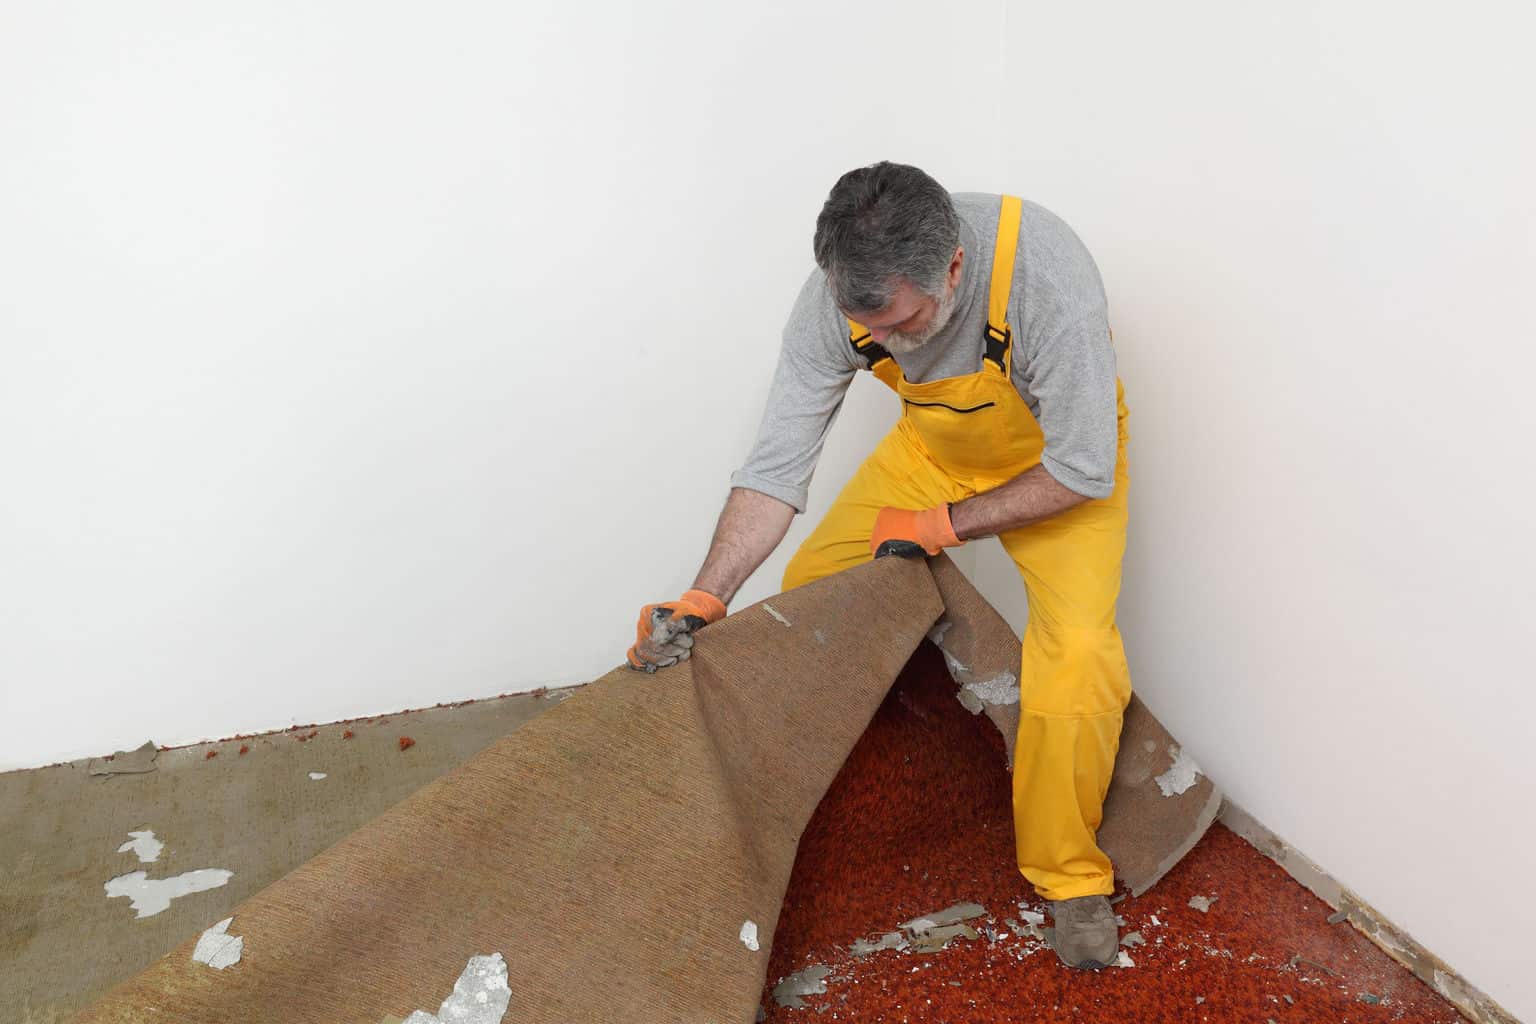
Step 1 - Remove the Old Flooring
Most of the time, concrete floors are hidden by carpeting, so you want to take the time to pull that carpet up. This will likely involve also pulling the padding, nails, and tack strips.
Step 2 - Remove the Baseboards
To lay hardwood, you need to have everything out of the way. If you are careful when removing the baseboards, you can use them again after the new flooring is installed, this will help you save money. Using a utility knife, you can very carefully separate the baseboards from the wall slowly work the boards loose. When you’ve removed all of them, store them somewhere out of the way.
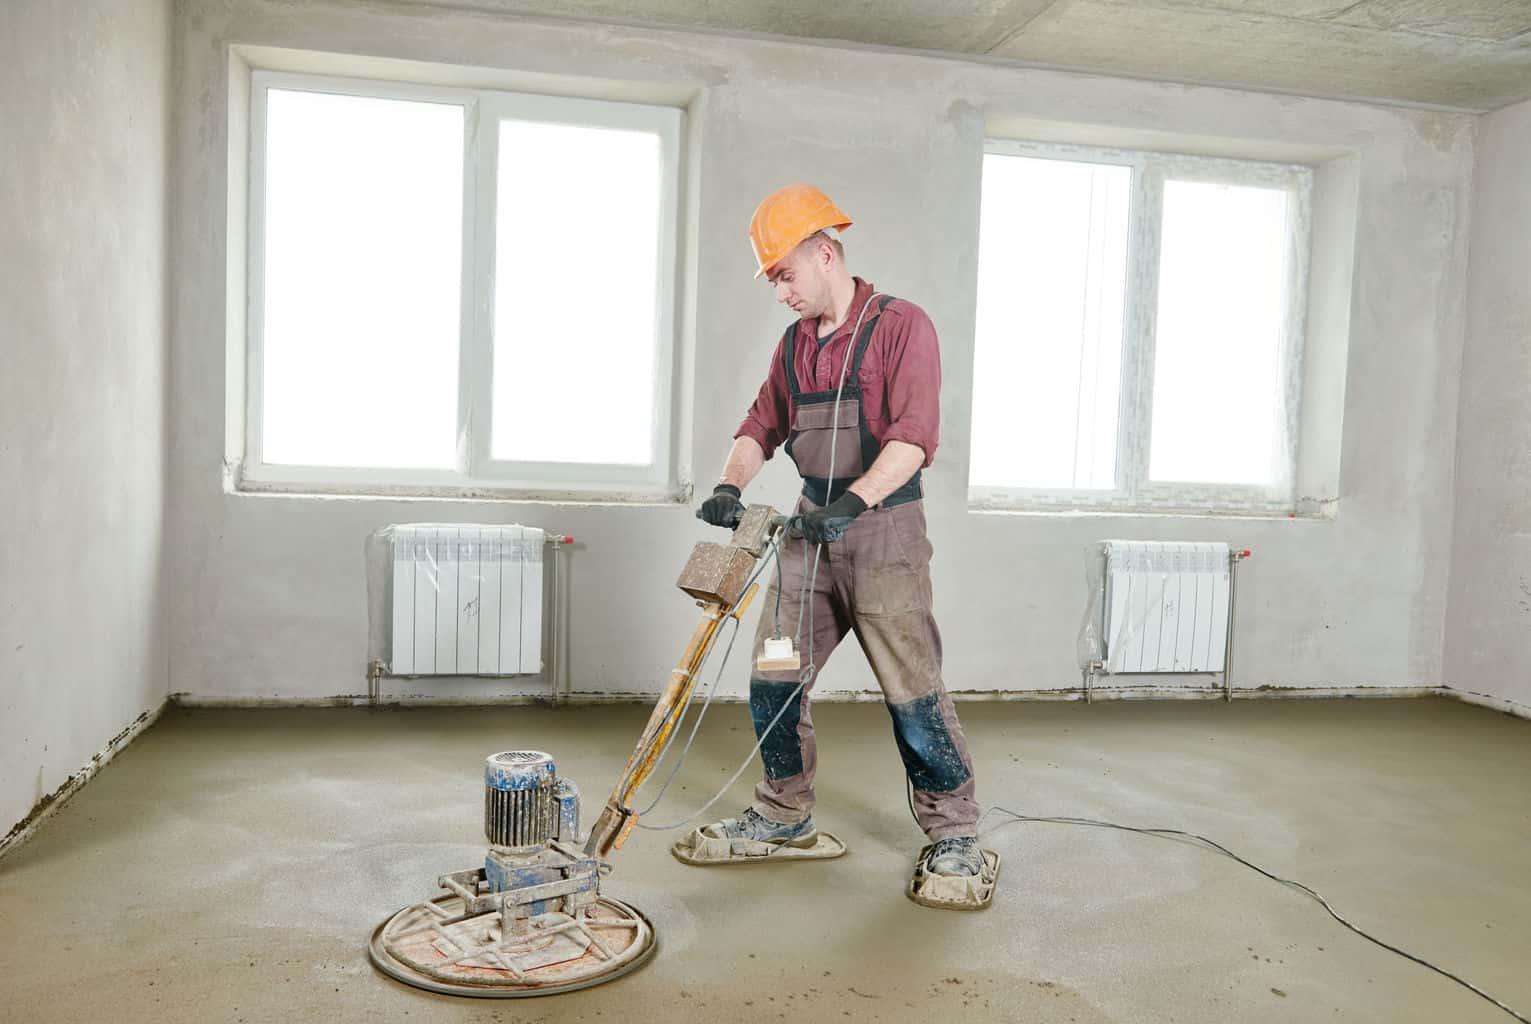
Step 3 - Prepare the Floor
You might find that the concrete beneath the carpet was painted, but if you want to be sure that the adhesive for the hardwood floor is going to stick, you’re going to need to remove that paint. It is not difficult to rent a concrete grinder from a store and use that to remove the paint. Be sure that you are wearing goggles and a mask to protect your face during the process. When you have removed all of the paint, carefully sweep and vacuum the entire space to be sure you have removed all of the extra debris.
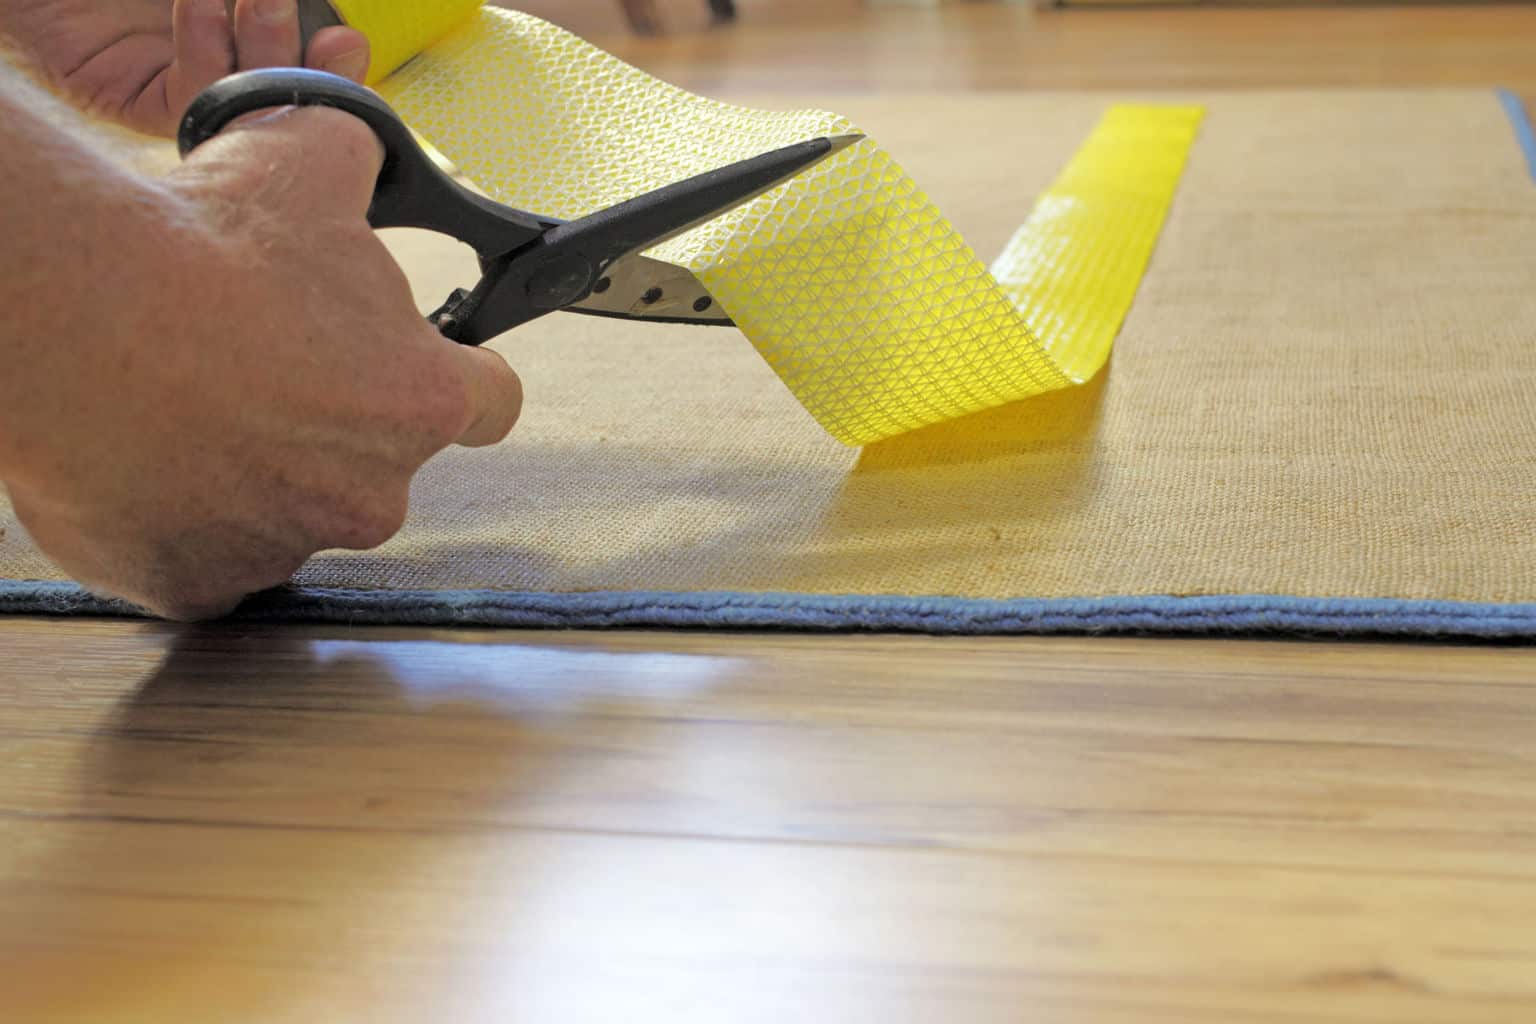
Step 4 - Apply the Moisture Barrier
When you are ready to use the moisture barrier, be sure that you open up winds and try to use a fan to circulate the air. Moisture barrier tends to have a strong odor that can be overwhelming without proper air circulation. Once you have prepared the room, and yourself, you can apply the barrier with a V-notch trowel. Be sure to keep it at an angle of 45 degrees. The nice thing about the moisture barrier is that it will level itself. Begin working from the farthest point and work toward the door out of the room. Once you have done this throughout the entire room, you need to leave it alone for 24 hours. Before starting work again, be sure that the surface of the barrier is not tacky.
Step 5 - Create a Flooring Layout
When you are laying floor, you never want to trap yourself in a corner and have to walk on new flooring. Thus, before you begin the installation process, it is important to have a plan. Always make sure that you are laying the flooring parallel to whichever wall is the longest in the room. It will be easiest if you make any necessary dimension cuts as you go.
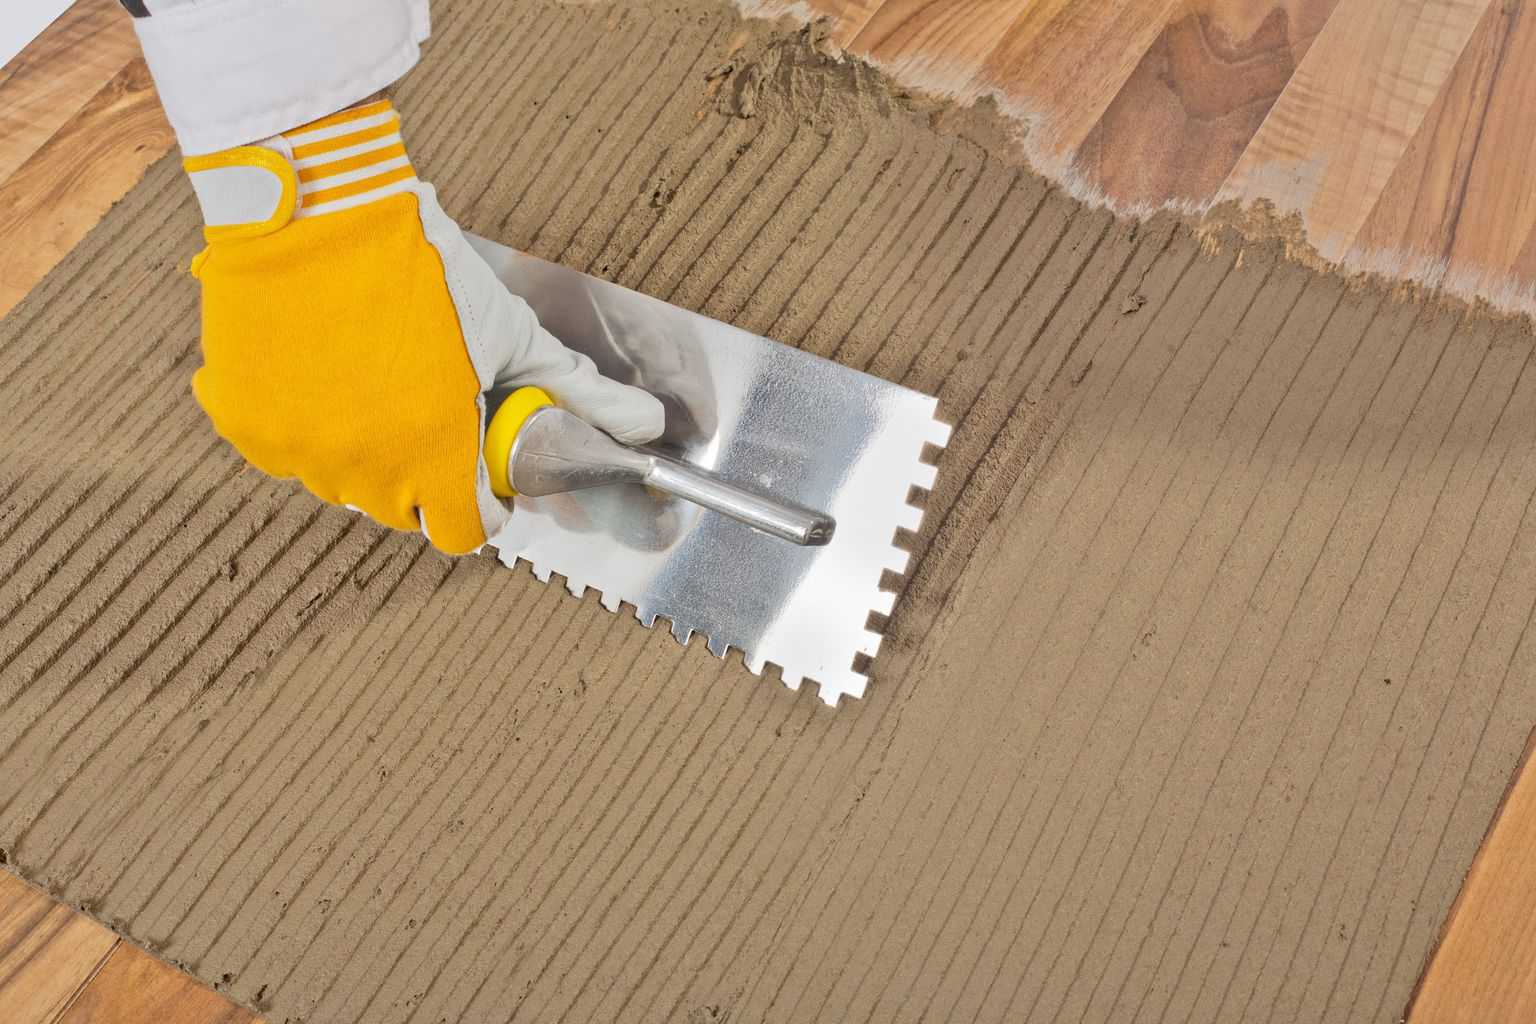
Step 6 - Apply the Adhesive and the Flooring
Not every adhesive is the same, so be sure to read the instructions before you begin. By using your V-notch trowel, start applying adhesive to your floor. Be sure to do this in small sections, only a couple rows at once. To click the different pieces together, you should use a tapping block. Don’t forget to stagger the end joints on every row and tape your seams together by using painter’s tape.
Remember that you need to leave room for expansion along the edges. Thus, be sure to place ¼-inch shams between the floor and the walls. It is best to apply some weight to the first few rows, but make sure you lay a rug in between the weight and the floor in order to avoid any damage. Using a damp cloth will help in removing any excess adhesive from the floor. Once you have completed the floor, let the adhesive dry for at least 24 hours.
Step 7 - Re-Install the Baseboards
Once the floor has dried long enough, you can use the baseboards that you saved and place them back where they belong.
While this process may look simple, it is important that you take the time to do it properly. When done right, this floor will be quite durable and last. You, of course, get to choose exactly what type of wood flooring you want, but as long as you follow these instruction exactly, you should have a nice, new floor within a few days.