| Learning how to install hardwood flooring is important for a long-lasting floor that won’t cause you problems. Your big question right now probably is who is handling installing hardwood flooring in your home or office. Are you installing wood flooring on top of concrete or vinyl flooring, adjacent to carpet, or directly to a plywood or OSB sub-floor? Will you get fancy by installing herringbone hardwood flooring, or stay simple and go in conventional straight lines? |
Installing hardwood flooring can be a cinch, or it can be a nightmare, depending on the sub-floor you are working with and the pattern you want to create. Do you do it yourself or hire it done?
There are three general methods installing hardwood flooring in your home.
- Floating
- Gluing
- Nailing
When it comes to choosing the best installation method, your sub-flooring should be taken into consideration to narrow down your installation options. If you have plywood sub-floors you can choose any installation method, but if your sub-floors are concrete, floating or gluing are advised. One trick of having a professional looking job is to start at a focal point, like a fireplace hearth and work from there. Once you establish your starting point, snap a chalk line so you have a straight reference point.
You can install wood flooring on concrete with proper care. Installing hardwood on top of vinyl or linoleum flooring may not take any preparation, other than starting with a clean surface. Installing hardwood flooring to carpet will often require a reducer strip to account for the different thicknesses.
Patterns for wood floor installations can be lots of fun. You could consider installing herringbone hardwood flooring pattern. Or think about a diamond shape. Maybe using different colors of wood can create a pattern like a throw rug with one color of wood acting as the border around the simulated rug. There are so many ways you can create interest with your hardwood floor installation.
Let’s look in detail at the different installation methods.
Floating:
The floating method of installing hardwood flooring has become very popular in recent years. Floating is a very stable installation method since it’s not attached to the sub-floor. It floats above it, allowing for the natural expansion and contraction of a natural product. Unlike other installation methods where each plank or strip is installed individually directly to the sub-floor, a floating installation involves gluing or clicking the boards together.
This method is very common with engineered and laminate hardwood flooring. Before beginning your floating hardwood floor installation decide if you want an underlayment (made of foam, plastic, or cork) to help insulate noise transmission. If you want that muffling, then the underlayment must be put down first. The wood flooring is then laid on top of the underlayment. The glue used along the edges can be water-based or petroleum-based, and it is applied to the groove of the plank and the boards are then tapped together using what is known as a tapping block. Excess glue is wiped off with a damp cloth. Repeat the process until the room is complete. That’s it!
The clicking method (or CLIC) literally involved clicking the tongue and groove edges together for each board you lay. it’s faster and cleaner because you don’t have to take the step of applying glue, and then wiping excess off the surface.
The floating installation is an excellent do-it-yourself method and someone with little or no experience can get great results.
Glue Down:
You opt for a glue down installation primarily when installing an engineered strip or plank floor over a concrete sub-floor. Glue down installations can be very stable once properly installed. The glue down method can be used with plywood sub-floors, making the wood floor quieter than with either floating or staple down floors because there is less creaking.
Before installing using the glue down method for your wood floor, you need to ensure that your sub-floor is level. If your sub-floor isn’t level, you can have serious problems such as popping because of improper bonding due to insufficient contact between the sub-floor and wood plank. If your sub-floor is uneven you will need to use a leveling compound before installation. Once the sub-floor is level, you can proceed with gluing your flooring using the manufacturer’s recommended adhesive. As the adhesive dries it shrinks, pulling your wood floor tighter to the sub-floor and giving a stronger attachment.
Installing glue down hardwood flooring on concrete takes care. Make sure the concrete is dry and not wicking moisture from the ground to your wood, causing it to warp. Check the levelness of the concrete and fix areas that aren’t level and smooth. Consider an underlayment to help insulate against cold temperatures.
Glue down installations are recommended for those who have experience working with the preparations methods that are described above. Be careful of fumes when working in an enclosed area too.
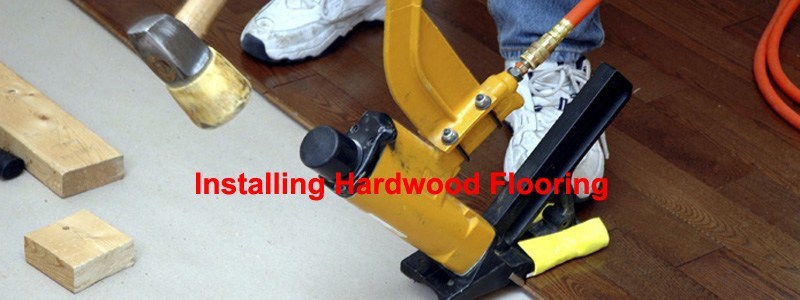
Nail Down:
Nail down installations are used when installing solid and engineered wood flooring. Solid wood flooring expands and contracts more than engineered and laminate flooring, so take care to acclimate the wood to your home’s interior before starting the installation.
Longer pieces should always be placed at entries and doorways if you are working with random lengths and the shorter pieces should be integrated throughout the floor. Nail down installations require that you place spacers around the perimeter of the room to allow the floor to expand and contract. When positioning your boards the groove side should be against the wall. Nails should go through the face of the boards and nails should be long enough to penetrate the sub floor by at least 1 inch.
Nail down installations will require some basic carpentry skills and specialized tools such as a floor nailer, miter and jamb saws. This method of hardwood flooring installation is not recommended as a do-it-yourself project.
Stapling, a variation of Nailing:
Staple installations have become very popular and is mainly used with engineered wood flooring. The staple down method is used over plywood or wood sub-floors. Certain woods may require specific staple sizes to ensure a secure installation; your manufacturer can give you this information.
Staple down installations are recommended for those with a moderate amount of skill using power tools. When stapling hardwood flooring, a special stapler is required. This can be rented from most equipment rental stores
Now that you know the installation methods available, you will be able to choose which is best for your hardwood flooring installation. Will you tackle the project, or hire it done?
Norvell,
The urethane sealer would provide protection against moisture. There is another article that may help Sealing Basement Floors.
I have removed a brekafast bar wall between my kitchen & dining area, leaving a 5 1/2″ X 5′ gap in my engineered hardwoof floor. My problem is repairing the floor, as there are no extra boards. To date, I have contacted four tradespeople, and umpteen floor companies to no avail. The original hardwood cannot be had. I believe it is a Bruce floor and was finished in an oil stain with a matte look. It looks like it was glued down. Do I have any options? Maggie
Hello,
I am going to install hardwood flooring in our living and family room on concrete slab. The only problem is our carpet is butted up against ceramic tile which is 1/2 inch higher that the slab. We are going to use 3/4 inch flooring and that would leave a 1/4 inch transition from the flooring to the tile. My solution would be to put a 1/2 subfloor on the slab which would allow a smooth transition with moulding. My question is if I use a 1/2 inch subfloor is that thick enough to nail/staple the flooring or would I have to glue it to it? And if it is ok to attach with nails/staples which do you suggest and what size? Any advice would be helpful! Morgan
Maggie,
If you cannot find the exact engineered hardwood flooring to repair with, I would suggest taking a photo of the flooring and compare it to what is available. Or possibly pick up samples at a home center that you could bring home to compare.
It is possible you will be able to find an almost exact match by a different name or brand.
Hi Morgan,
Nails should go through the face of the boards and nails should be long enough to penetrate the sub floor by at least 1 inch. So, that may not be practical in this situation.
The staple down method is used over plywood or wood sub-floors. Certain woods may require specific staple sizes to ensure a secure installation; your manufacturer can give you this information.
As for the floor widths, if you begin with a 1/4″ difference, and add another 1/2″ for the subfloor, you will now have a 3/4″ difference in the two floor surfaces. So, the glue down method may work better. However, I would be sure the concrete is sealed and will not allow moisture through to your new floor.
Hi
I have bought Urban Floor engineered wood and I would like to install it upstairs that have plywood. What is the best way to install? Glue down with cork? What is the best–uretane-based, water-based, or alcohol-based. My son has allergies and I want to limit his exposure and is any one of these a green-product? What about Stauff glue?
Thanks you,
Doris
I leveled my 3/4″ OSB using Bostik SL-175 floor leveling compound. Can I nail my hardwood floor through the compound. Thickness is 1/4″ average. Area size varies.
I’m installing 5/8 inch engineered floor on my main level. The sub-floor is plywood or osb and living in Colorado I do not have any moisture barrier concerns for laying the floor. The flooring manufacturer suggests gluing down the floors so I’m left wondering if I need a simply adhesive like Bostik Duragrip or if I need a moisture barrier product like Bostik Greengrip? What are your thoughts?
My wife and I are thinking about installing hardwood floors when we remodel our living room, so thanks for sharing this. I like your point about how longer pieces of wood should be put in the doorways. I can see how this would help when the wood is expanding and contracting.