
You might have heard about how easy it is to put in a glueless laminate flooring installation. It was designed to be accommodating for DIY enthusiasts who do not put flooring in very often. Pretty much all you have to do is make sure it goes in straight and interlocks smoothly. However, we've found that putting in glueless laminate flooring is not quite like putting a puzzle together and hoping for the best. It's fairly easy for beginners to make these common mistakes that might lead to having to redo the flooring installation.
5 Common Mistakes When Installing Vinyl Flooring
1. Forgetting to Store the Flooring in the Room For a Few Days
It's understandable if you brought home the new flooring and want to install it right away. However, most experts recommend waiting a few days because it needs time to adjust to conditions in the room. If possible, keep the temperature of the room between 65 and 80 degrees Fahrenheit while storing and installing it. This is especially a concern if you live in a climate that might cause the laminate to expand or warp, so it does help to calculate for this expansion when putting in your new flooring.
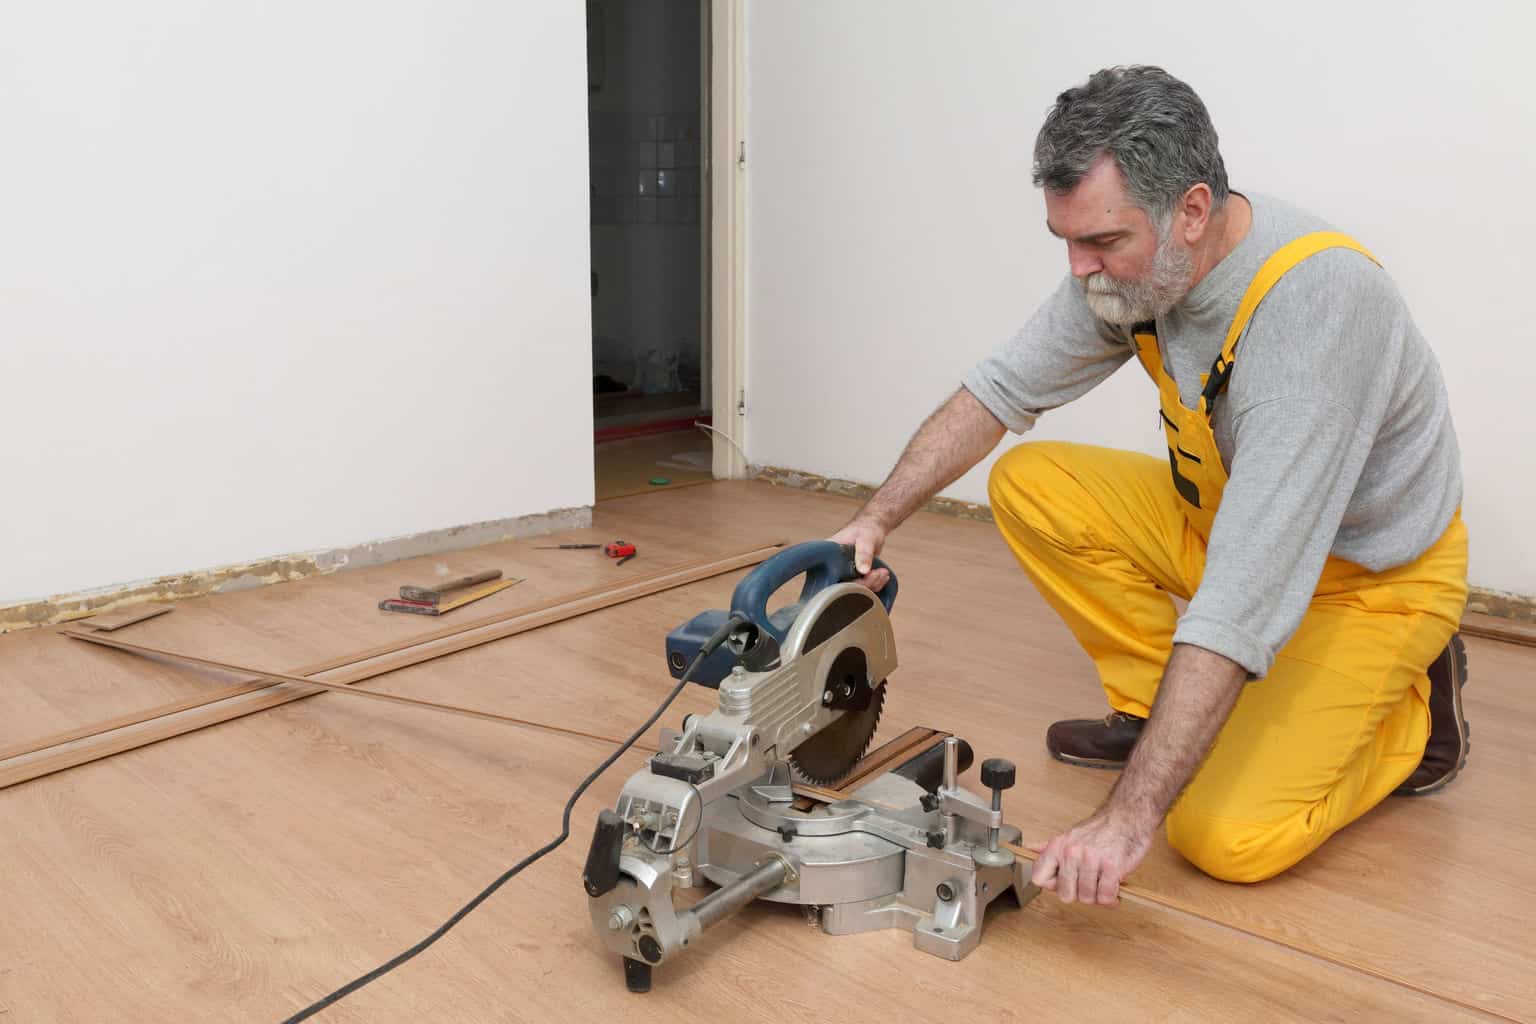
2. Cutting the Laminate in a Way That Leads to Chipping
If the laminate is not cut properly, it can cause chipping in the top layer of the laminate, which can lead to a more unsightly surface damage over time. The top layer is a printed design on a thin material that is very easy to damage if cut from the bottom or in a way that could make the entire end of the board uneven. Make sure you use a saw with a blade that is as sharp as possible and cut into the face with the printed surface on top so that any chips will be less likely to be exposed.

3. Not Knowing That the Pattern Repeats Itself
Most laminate makes use of only a few printed patterns. Putting two planks with the same pattern beside one another is actually a pretty easy mistake to make, but you'll definitely notice later when you see that two side-by-side boards look practically identical with maybe a slight variation in color from having been made in two different batches. Laminate is never going to fool an expert who knows how to look for the difference between laminate and natural hardwood, but it looks especially fake if it was installed in a way that puts two identical patterns beside one another. A lot of people solve this problem by arranging boards from two or more different boxes in a way that no two boards from the same box will be installed beside one another.
4. Forgetting About the Underlayment
The underlayment can shift, especially if you're walking on it a lot between the time you take up the old flooring and the time you have your new flooring completely installed. The underlayment may also have been damaged by exposure to hidden water deposits or normal wear and tear. These are issues that might cause unnecessary degradation in your glueless laminate flooring installation if the underlayment is not repaired or replaced before you put it in. If you are uncertain about the condition of your underlayment, an expert can point out any issues that will need to be addressed before you can safely put in the glueless laminate flooring installation.
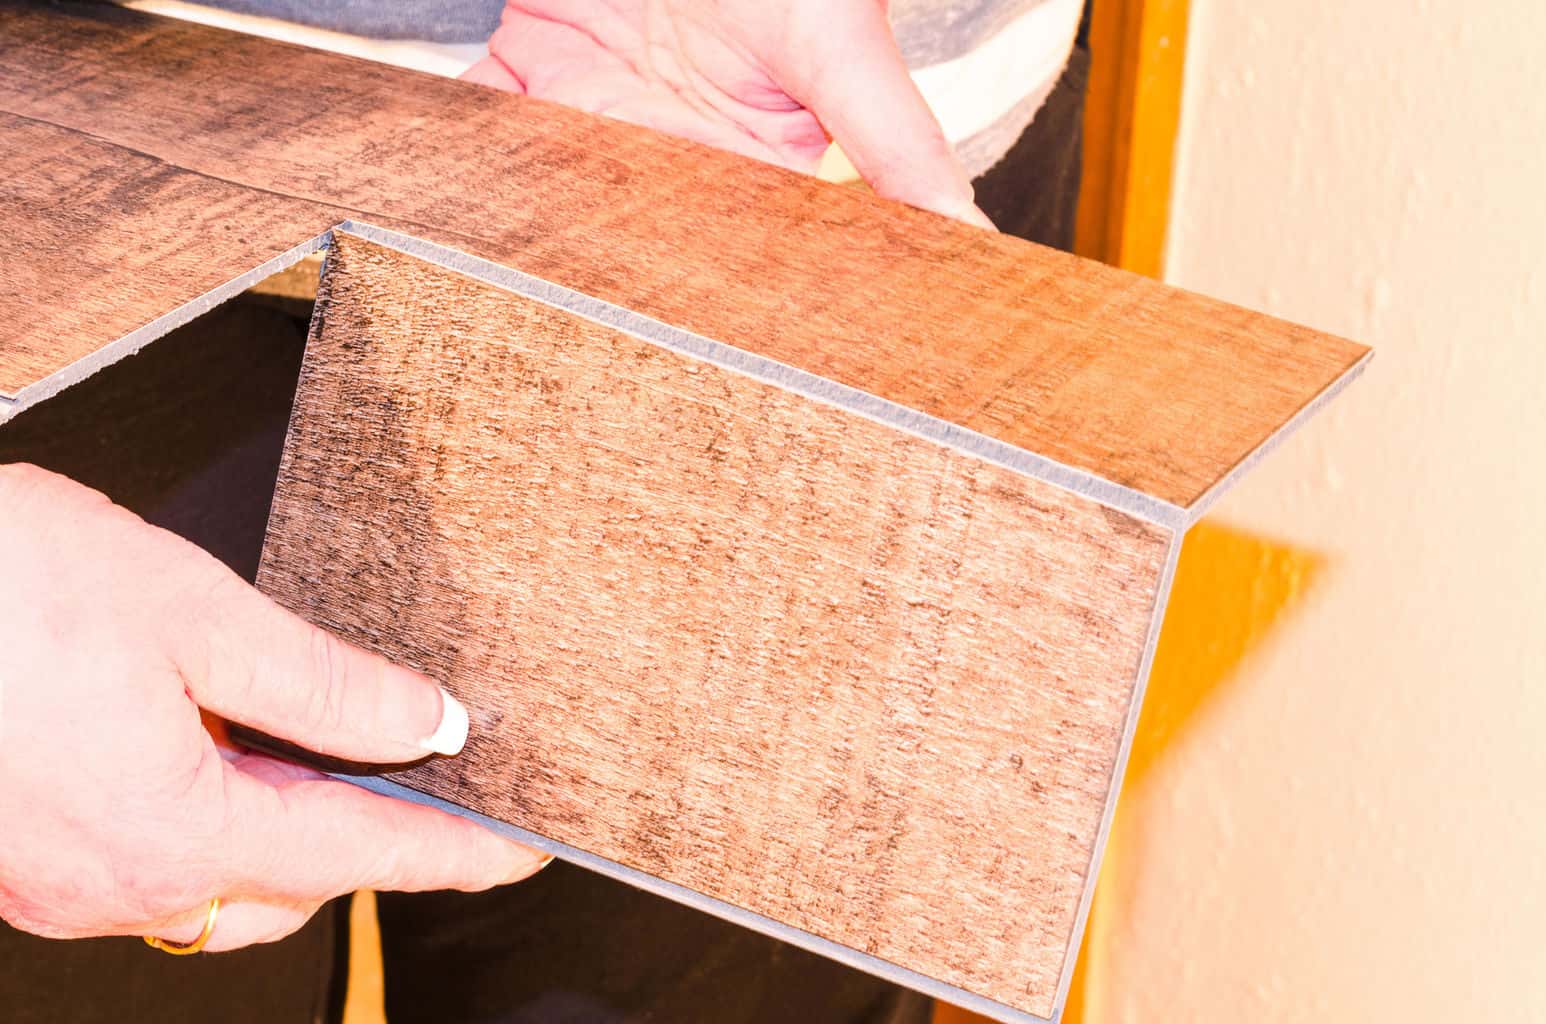
5. Trying to Force a Locking Mechanism That Won't Go in Easily
This is where you can carry over some techniques for putting together a picture puzzle. If it goes in easily, it fits and you can lock it firmly into place. If it doesn't, you're going to damage an ill-fitting “puzzle piece” by trying to force it into place. Most of the time, this won't be a problem because the glueless laminate is designed to fit together like completely identical puzzle pieces. Sometimes, though, you might run into a piece that won't go in easily. A lot of the time, this can be solved by sanding the piece where the problem exists or just using another piece.

Putting in a glueless laminate floor installation is actually pretty easy if you can avoid these five mistakes. Its interlocking pattern was designed for people who would rather save money on the installation by doing it themselves. One thing we like to tell beginning DIY floor installers is to take their time so that they can avoid making a mistake that could lead to damage of their new flooring over time.
Vinyl Flooring Installation and Removal FAQs
Asbestos Removal
Precautions
Q
We bought our house in September 1980. Shortly thereafter, we had Armstrong Solarian vinyl installed in the kitchen and dining room. Many years later, I had it tested and they confirmed asbestos content.
If it was banned after 1972, why was it being sold and installed in 1980? I’d like to remove it completely instead of covering it because it will change the floor level from one room to another and pose a tripping hazard. Is there instrumentation that can monitor asbestos particulate in the air? I thought I heard about such equipment.
- Anne
A
It’s a mystery to me too how a company, especially one like Armstrong, can get away with using banned materials. But this isn’t the first time I’ve heard of such a thing — be it lead-based paint or asbestos containing flooring or siding. I guess it has something to do with in-stock supplies, but I’m only guessing about that.
Generally, according to my understanding, asbestos-laced materials aren’t a problem with air particulates until they material is disturbed. Ways of disturbing it are cutting or ripping it, or removing it.
Some people do their own asbestos removal, but it’s recommended that trained, approved and licensed contractors deal with it so the air quality and disposal are appropriate when they are done.
If the floor is in good shape, why not just leave it for now?
- The Flooring Lady
Q
Hi: we have a very old one story apartment house that was tested for asbestor in the vinyl flooring that was laid in the kitchen and bath. this building will be burned down by the local fire department and a practice burn. Do we need to remove the flooring first? Thank you.
- John
A
Yes, it should be removed. Please read through the comments to learn more about this.
Here’s an article that will give you more insight as to why this would be dangerous – it’s about an apartment building in Boulder, Colorado that caught fire and had asbestos containing material.
- The Flooring Lady
Q
Our house was built in 1981 and we still have the original vinyl. We are going to replace it with tile but our contractor does not remove the old flooring.
I thought I would start trying to pull some of this up and notice the backing was sticking to the floor. I was looking for ways to remove this stuff and was alarmed to find out that some vinyl could have asbestos backing. I’m a little worried right now. Should I be concerned.
- Sally
A
Hi Sally
Chances are you should be o.k. – however, I have read where some asbestos flooring was used even as late as the 1980’s. Best thing to do is to go to Home Depot, Lowe’s, etc. – and buy a test kit for asbestos. It shouldn’t be needed, but at least it will give you an answer so that you know if your fears can be put to rest or not.
- The Flooring Lady
Q
My daughter and son-in-law are buying a 1950’s house. The downstairs will be used as a recreation room. At the moment the floors are covered with asbestos tile with several areas of tile broken and completely removed.
They are aware of the problem and are considering carpeting over the entire area. Should they fill in the broken tile with other safer tile and then paint with epoxy before carpeting?
- Pam
A
Hi Pam
I wouldn’t recommend carpeting if there are any moisture issues or if there is high humidity. Carpeting is nasty for harboring allergens such as mold and mildew (to just name two!).
Filling in with other tile will work, as would just using some thin-set, concrete or grout. Painting over with epoxy afterwards is a good idea.
- The Flooring Lady
Q
For do-it-yourself cleaning, after remove the vinyl material and wet scrubbing it off, how do we know the floor is really clean of asbesto? Can I see asbesto fibers on the floor with naked eyes?
- Laura
A
Hi Laura
You don’t know, Most of the time, you can’t see it with your naked eye. This is why it’s best to have a professional who is trained in asbestos removal handle a job that is this important.
Hopefully too, you were aware that there are Federal and State Laws governing asbestos removal and didn’t just dispose of it along with your weekly trash.
- The Flooring Lady
Q
My home was built in 1979. It has a glued down sheet vinyl floor. Is it OK to remove it?
Thank you for your help.
- Paul
A
Hi Paul, Yes, it would be fine to remove it. If it’s still in good shape, and depending on the type of flooring you wish to install, you could install right on top of it.
- The Flooring Lady
Safety
Q
Armstrong solarian floors were installed in both bathrooms and the kitchen of my mother’s home in 1982. A family friend was helping ready the house to sell after Mom’s passing and he used an electric planer on the floor to remove most of it.
It created superfine dust throughout the house. I took a sample in for testing after I read the instructions on the adhesive for the new floor. The results stated that the backing layer was 70% asbestos. What do we do now? I don’t think we can even sell it.
- Chris
A
Bummer about your friend’s approach. Personally I would have tried to floor over it so I wouldn’t have the removal hazards. But, what’s done is done. Now to move on and clean your air.
You can’t sell it until you clean up the air. You shouldn’t even be in there now without respirators designed to protect your from asbestos fibers. I think you are going to have to call in professionals to handle the air filtering and clean up — everything is coated with fibers now, if I understand this correctly.
Please be careful so you don’t get sick from this.
- The Flooring Lady
Q
I bought and older home with a smaller kitchen (10×15). After removing the old cabinets we discovered there were actually 2 layers of older flooring. After having them tested for asbestos, the bottom layer tested negative however the top layer tested positive containing 25% asbestos.
It will cost me 1500.00 to 1800.00 to have it professionally removed and I am debating on whether or not to remove it myself. My question is if I follow the guidelines of removal and since the amount of asbestos in the top layer is only 25% do you think this is a wise and safe decision? Like the earlier poster adding another layer to this floor over top of the existing flooring will make it too high. Thanks for your help!
- Joe
A
Hi Joe! Much as I advocate do-it-yourself-ers, this is one time where I’d recommend having a professional do it. There’s so much to consider when removing old abestos flooring. Is it friable (i.e., crumbled, pulverized, or reduced to powder by hand pressure)? Is any of it cracked, flaking or otherwise damaged?
If so, you risk contaminating your entire house if you try to take these up yourself and creating the ultimate environmental nightmare in your home. The mastic (black glue adhesive) also contained asbestos in the old days and that has to be removed as well.
You also MUST wear a respirator & safety glasses – no ifs, ands, or buts.
n most states, asbestos can be removed only by licensed asbestos abatement contractors who are equipped and educated in safely removing and disposing of hazardous materials.
They’ll usually use plastic sheets to stop the particles from freely moving. VAT’s (vinyl asbestos tile) are usually wetted down too, so as to keep asbestos particles from becoming airborne while being removed.
Once removed, the tiles are put in containers, sealed, are taken by the authorized agent to a landfill site that is approved by the EPA and is buried.
It’s NOT recommended to attempt removal yourself and in most states there are penalties if it gets found out that you did so. It has to be disposed of safely and you can’t just set it out in your trash for the garbage man to pick up.
Personally, I think that $1500 – $1800 is a small price to pay to keep from damaging your lungs or getting cancer, as well as taking into consideration the others who come into your house.
- The Flooring Lady
Q
is it safe to drill through asbestos tile it was 2 2mm thick theres about 6 to 8 holes half inch wide and how safe is the room does it have to be tested .also there is some breaking and chiping in some others there was a hoover used a industrial one there apperas a lot of dust on outside bair in mind its woodwork room to. the whole floor is this type tile but in mostly in good condition
- Thomas
A
It is never safe to drill through asbestos tile. The asbestos will become airborn, posing a serious threat to your health. I suggest you read up on asbestos dangers – go to your favorite search engine and start from there.
If you have dust, chipping, cracking, it’s very unstable and unsafe. You need to have it removed by a professional or cover it up completely. You can have the room tested if you want, but why would you do that if you already know the tile contains asbestos?
I’m serious, read up on asbestos dangers, removal, etc. It’s seriously bad stuff – you’ve endagered yourself and anybody else who has been in there.
- The Flooring Lady
Q
I have a mid-1970s townhouse, and had already pulled up about 50 vinyl tiles in the basement when I discovered that the tiles have asbestos in them – the analysis says 2% chrysotile, 98% particulate, so I’m guessing that means they are 2% asbestos.
I was using a long heavy pole with a blade on the bottom that was working great, but broke up most of the tiles, and then just shoveling up all of the broken tiles and putting them out with the trash.
So OK, should I prepare for lung cancer? I stopped busting up tiles when I was alerted to the asbestos possiblity, but there are about 20 or so broken tiles in my basement and I don’t know what the heck I’m supposed to do now.
I really can’t afford $20,000 for men in space suits. Should I just stop now, clear out the broken stuff and put plywood down on top of the whole floor (it’s about 300 square feet total) and new vinyl on top of that, or what? Thanks for any help.
- Nan M
A
Yes, cover it up – that will work fine. Hopefully you won’t suffer any health issues down the road.
- The Flooring Lady
Q
OK, between the time of my original posting and today, I have spoken to two very knowledgable guys in the construction industry (not connected to each other). Both are licensed builders, one is now a county code and building inspector and the other does abatement work for a private environmental group. They both said the same things about my 2% chrysotile floor: No Big Deal.
They recommended that I wear a good face mask while working ( I got one for $15 that is used for scraping lead paint and they said that one is fine), and to damp down the area being worked on.
They also said breaking tiles is not a problem because the asbestos is so fused in there, but I should not sand, grind or drill the tiles. Which I wouldn’t anyway. For disposal, it is legal for me to just put it out with the trash, but the best thing would be for me to cart it to a dump that accepts “category 1” waste, which they said most dumps do (mine does, I checked).
That’s what I’m going with. I”m sure the answer would be different if the tiles contained 60% asbestos. I hope this helps others in making a decision.
- Nan M
A
I do hope they know what they’re talking about. Different states have different laws, but it is regulated by the EPA at a national level.
- The Flooring Lady
Q
I just bought an old home that has abestos flooring tile. I was cleaning out the basement and noticed about 7 tile were loose, just lying on the floor, and I gently removed them and placed them in a plastic bag. Then I carefully swept some of the remaining dust and put that in the bag as well. I threw the gloves out and rinsed the broom. After reading up on asbestos tile, I am going to call in an expert to look at the rest of it and remove the few tiles I have in the bag. My question is, do I have reason to worry now about my health?
- Tim
A
Hi Tim
Hopefully not, since your exposure time was very short and the dust wouldn’t have been that much. If the tiles that you removed were intact then there really shouldn’t be much asbestos in that if any. It’s just one of those things that you don’t know.
- The Flooring Lady
Q
My husband and I bought an old property with a 1956 aluminum trailer on it. It had asbestos tiles under sheets of vinyl flooring. It all had to come up, as it was very uneven, He got me started and I went to work, The asbestos tiles crumbled, and it was black and a very fine dust that flew everywhere. We knew nothing of asbestos poisoning or mesothelioma. Since then he died of it. They think he died from his plumbing history of tearing down old buildings with asbestos lined pipes. That was back in the late 50’s and early 60’s when he did that work.
I did the flooring tiles in the early 90’s. I am concerned about my lungs. I recently went to the hospital for acute bronchitis and double pneumonia which cleared up enough in 6 days to go home, and finally totally clear in another couple weeks.
If the exposure to the asbestos is to do me harm like it did him, what should I look for in symptoms, and how long approximately, will it take to present?
Scared
- Glenda
A
Hi Glenda
It’s really sad to hear that your husband had to die because of exposure to asbestos. So many people today do not take the threat seriously. Sadly, years ago, people didn’t realize how exposure to asbestos or lead could impact one’s health.
I’d really recommend you talk with a pulmonary specialist or at the very least go to webmd or another health site and look up information on mesothelioma. I’m a far cry from a health professional and cannot, in good conscience, give health advice.
- The Flooring Lady
Q
Dear Flooring Lady, we recently sent some samples of our 1955 home to an absetos testing center. Luckly our plaster walls & ceiling came back negative but the flooring in our kitchen tested positive for 15% cyrsotile. From what we can tell our flooring has a couple of layers of vinyl and ugly tile underneath.
We are planning on putting down cork flooring and since there are already so many layers we can’t just put it on top. We would like to remove the vinyl but leave the tiles intact (we only had the vinyl tested not the tiles) so we are not sure if the tiles also contain absestos. I guess our question is how dangerous is 15% and should we follow the same procedure for removing it. We have a newborn at home and want to be as safe as possible but we can’t afford a removal company. Thanks
- Christine
A
15% is dangerous. The tile probably contains even more asbestos and the adhesives too. You really should have it removed professionally. You can do it yourself as well, but it must be done as a wet process so that asbestos particles don’t become airborn – then you’ll run into the problem of disposing of it properly (and legally). If you have a removal company do it, they take care of that aspect as well. With so many layers, I’m afraid this may be your only true option.
- The Flooring Lady
Q
My neighborhood was built around 1980. My neighbor said her original laminate floor was tested for asbestos and it was positive. We have the original laminate floor under a new laminate floor. Is it dangerous for the kids? She told me it wasn’t dangerous unless you were tearing it out. Thank you!
- Jennifer
A
So long as the original flooring is covered, it’s ok. The danger is when it isn’t covered or is being taken up, then tiny particles become airborn and can be inhaled.
- The Flooring Lady
Q
OK, so what if you already ripped up an entire floor that may have had asbestos dust flying everywhere? Do you immediately become sick?
- Laura
A
If you still have any of the flooring around, you can buy a testing kit at Lowe’s, Home Depot, etc. and find out for sure so you don’t have to (hopefully!) worry yourself needlessly.
To learn more about asbestos (hazards, health issues, etc.) here is a link for the EPA: http://www.epa.gov/asbestos/
Hoping you’re worrying needlessly ……..
- The Flooring Lady
Q
Oh boy, I think I blew it. I live in a 1973 mobile home and I am laying the new Armstrong Assure wood vinyl flooring (which is beautiful).
I have been removed all of the original sheet vinyl in the kitchen but haven’t gotten to laying the new wood vinyl flooring because I haven’t been feeling well. OMG! Could it be because of asbestos?
I have had a terrible headache above my eyes, my eyes are constantly burning and feel like their going to bust. I went to my doctor and my eye doctor and they are not finding anything wrong.
If it is the vinyl flooring asbestos, now what do I do?? Other than lay the wood vinyl flooring!
Maybe it will go away then.
Help!
- Joan
A
These symptoms could very well be from dust that has been stirred up while working on the floor, rather than asbestos.
An important thing to remember with any type of work in your home, is to allow ventilation and fresh air.
- The Flooring Lady
Refinishing and Sealing
Q
Hi-
I am trying to find a good sealing product to apply to the asbestos vinyl sheeting underneath the current carpets in my home, which we will be taking up and replacing with laminate flooring There are a few places at the edges by the vents where the vinyl is exposed and we’d like to seal it off. Suprisingly, it is nearly impossible to find anyone who knows anything on this subject?
Thanks!
- Tom
A
Tom, asbestos is such a can of worms that I’m not surprised that people don’t know anything about it. If one doesn’t know about asbestos one can’t get into trouble with the help they offer.
What I know about asbestos is that you don’t want to disturb it. It sounds as if you are taking measures to not disturb it, and in fact to protect it from further damage. That’s a good start, in my book.
Why don’t you get a glue that will adhere to vinyl and apply it to the edges of the vinyl? You may want to wrap the glue up onto the top edge slightly to make sure you have a good seal. And with the vent covers in place you wouldn’t see that glue edge, even if the laminate flooring didn’t cover it completely.
- The Flooring Lady
Q
Thanks for your informative article. We recently purchased a Mid-Century Modern style home, built in the 1950’s. The kitchen is in its original state, however, the previous owners put wall to wall carpeting in the kitchen that was ironed onto to the previous 1950’s flooring.
The carpeting is already too high and interferes with the opening of some cabinets. I wanted to remove the carpeting with a heat gun and use the original flooring, but now I am alarmed by the thought of asbestos being in the floor. According to the previous owner, it is a tile type floor, not lino.
So my question is: Is it possible to use this type of flooring, even though it might contain asbestos? I read if it is encapsulated in the flooring, as long as it isn’t damaged, it isn’t harmful. Is there some sort of coating that we could put over it to seal it good and tight without have to pull it up? Or would our best bet be to cover it with another type of flooring?
Also, I am hesitant to pull up the carpet and purposely damage a tile to get a sample to send to the lab.
- Ruth
A
Ok, let’s tackle your questions in order.
#1: So my question is: Is it possible to use this type of flooring, even though it might contain asbestos? Answer: Yes, what you’ve read is correct.
#2: Is there some sort of coating that we could put over it to seal it good and tight without have to pull it up or would our best bet be to cover it with another type of flooring? Answer: You can do either one (or both!) so long as the flooring is intact. There are different products you can use to coat it, but the most durable is going to be an epoxy type paint, the stuff is about indestructable.
I can understand why you’d be hesitant to pull up a sample to send to the lab. If you do remove the flooring and it can be done without damaging the tiles (not likely!) they still have to be disposed of properly.
- The Flooring Lady
Q
My home was built in 1964. I have an old lineoleum floor on top of the original vinly square tiles which are glued down with some black stuff that looks like an asphalt glue which apparently may contain asbestos. I was planning to overlay with a laminate, but when the flooring company came out to complicate the issue my floor was not level.
Now after going to the expense to have my foundation repaired and the house leveled, there may be an issue with the some of tiles which are now cracked and I’m in a fix as to how to remedy the uneven tiles so the laminate can be layed over them.
One contractor said he could just sand the uneven spaces (sounds like creating potential asbestos dust everywhere). I’m in such a fix with the laminate already purchased and really don’t know exactly where to go next. I need direction as to who I can trust to help tell me how to safely remove the tiles/or how to make the floor smooth enough to go over with the laminate. I choose laminate since it supposedly floats, but how much floating can it actually do.
- Sandy
A
By ‘floating’, it simply means that it can expand and contract naturally without worrying about it warping because the edges don’t touch the very edges of the walls.
It doesn’t really float up and down, which is why you need to work with a level floor. I have no idea just how off level your present floor is, so I don’t really know what measures can be taken to smooth things out.
Sanding the tiles can be done so long as it’s a wet process and it’s cleaned up while wet. Old asbestos flooring is safe so long as it’s covered up completely. You might want to consider sealing it with an epoxy substance or sealer of some sort even before you put down the underlayment. The damaged tiles should be removed (also using a wet process) – you can then fill in the spots with a leveling agent of some sort.
- The Flooring Lady
Q
Help! I remvoved tiles from my basement floor because of water damag, later to find out that contained asbestos! I have throuroughly cleaned it, but the stick (mastic?) remains. I wanted to know if I could just seal the floor, or put a thin layer of concrete over it? Thanks!
- Donna
A
Hello Donna, How much of the flooring is attached to the mastic? Unfortunately, the damage has been done and you may want to call in the proper hazmat team that’s trained in asbestos clean up.
I don’t think you can pour thin concrete layers onto concrete and get a satisfactory bond or result. You may want to just install one of the moisture proofing subfloors discussed in a few of the articles; that would take care of future moisture problems and the glue issue.
- The Flooring Lady
Brands and Prodcuts
Q
where do i get a do-it-yourself home sampling kit?
- C.J.
A
Hi C.J.
Some hardware stores and big box retailers now carry them and they are also available online. You can always use a search engine (Google, etc.) to find which stores sell them.
- The Flooring Lady
Q
What methodology does Home Depot use to remove vinyl or not. I noticed they now have a charge to remove vinyl whereas they did not 5 years ago when I had another floor done.
- Dandy
A
That would be a good question for Home Depot. I am not privy to their policies.
- The Flooring Lady
Q
Hi, I am having new carpet installed and the installer just told me that the vinyl flooring is the asbestos type. He said that it is in good shape and can install the carpet.
However in the coat closet, when he pulled up the piece of carpet on the floor there 3 tiles already missing from the floor. He said there was no dust and the others were not loose and that it would be ok to cover it and should be covered until we decide to do something with the entire floor. I decided to look up asbestos flooring and found you, praise the Lord! What do I do? You say not to recover it without taking care of it. I don’t have a clue who to call.
Thank You
- Marcella
A
Marcella
The Article states,
“However, intact asbestos vinyl flooring should not be removed because the removal of an intact floor poses a greater risk than simply covering over the old flooring.
If you determine that the asbestos vinyl flooring must be removed, asbestos abatement contractors are highly recommended.”
It seems as if your contractor agrees that it is safer to cover over. Perhaps a second opinion is in order if you are unsure.
- The Flooring Lady
Is It Asbestos?
Q
if old vinyl comes up real easy, what are the possibilities that it has asbestos on or in it? It was layed over plywood.
- Stephanie
A
It depends on how old it is…….asbestos was not supposed to be used since 1972. Also, so long as it comes up intact, so long as there’s no chipping, breaking, crumbling, it’s ok.
Disposing asbestos tile is another matter entirely though. ;~)
- The Flooring Lady
Q
Our house was built in 1980, and we still have the orginal vinyl, which was good quality for the time, but is now worn with a few holes. Any chance that it contains asbestos? I’m confused. Since asbestos was banned in 1972, but the post above from Chris said the floor with asbestos was installed in 1982. Can you clear this up? Do I need to test my floor?
- Lori
A
Hi Lori
Yes, asbestos was banned in 1972 and shouldn’t have been used after that. However………. I have researched on the internet and there was still some flooring being used that *somehow* contained asbestos. I don’t know if this was being done intentionally (and therefore illegally), if it was old stock or what, and I’m not going to speculate on it…….. you know, kind of like how toys coated with lead paint made in China still made it’s way to the USA as recently as this year. By all means though, have it tested to ease your mind if you feel the need. Chances are there won’t be any asbestos in it.
- The Flooring Lady
Q
We had our house built in 1990. would the lino in the kitchen have any asbestos?
- DW
A
Good news! Asbestos vinyl flooring was widely used until 1972, so it would be almost certain that your flooring does not contain asbestos. If it makes you feel better, you can always have it tested either by a professional or a do-it-yourself kit, but I wouldn’t think it’s needed.
- The Flooring Lady
Q
ok Home Depot will not lay ceramic tile over our sheet vinyl flooring which was laid when the house was built in 1986, their reason is that the adhesive might have asbestos in it.
- Susan
A
The adhesive or the sheet vinyl? If they’re worried about asbestos in the adhesive, that’s just plain silly since the vinyl is over it. Did a sales person tell you this? Did you ask a supervisor? You could check with some local home improvement contractors and see what they think, maybe even get one to install it.
- The Flooring Lady
Q
We are planning on tiling our front entrance in our home…there is vinly flooring currently in place and our house was built in 1997. We went to HOme Depot to see if there was a product to help remove it and the sales person alarmed us and said that there is asbestos in it..what are the chances of that and should we remove it?
- Lisa
A
Asbestos flooring products were banned in the 1970’s. I doubt you have anything to worry about since your house was built in 1997.
- The Flooring Lady
Q
We are renovating our home which was built in 1979.
I would like to remove the vinyl flooring in the kitchen to install a hardwood floor. I want to remove it so the flooring will flow evenly into the adjacent rooms (after carpet is removed). Do you think the kitchen flooring could have a possibility of asbestos if it were installed in 1979?
- Phil
A
Chances are it doesn’t contain asbestos. If it eases your mind, you can always have it tested. ;~)
- The Flooring Lady
Q
hi i am about to remove carpeting from the living room and getting tiles installed, the house was built in 1992 do you think the layer under the carpet may contain asbestos ?
- Irfan
A
You shouldn’t have any asbestos since the house was built in 1992 – asbestos was banned 20 years before that. If it helps to ease your mind, you can always have it tested. ;~)
- The Flooring Lady
Q
I am currently renting a townhouse, that was built in 1985. I have recently asked to get new lynol flooring in my bathroom and storage rooms. I was told they cannot give me this until they test for asbestos. ( they told me that the likeliness of this was rare but they should test). Do you think it could at all be possible for my townhome to have asbestos? also how long does it take to get the test back?
- Kayla
A
It’s actually a good thing that the landlord/owner cares enough to test the flooring. Chances are, it won’t contain asbestos and he’s only wanting to cover his butt, but that’s a good thing for you too! Chances are slim that it would contain asbestos. As far as how long does it take to get the test results, well, it’s going to depend on the lab that’s doing the testing. Shouldn’t be more than a couple of weeks though.
- The Flooring Lady
Q
I sent you a message about my townhouse built in 1985 possibly containing asbestos in it.. My landlord did get it checked for asbestos and the results came back positive. In one of my storage closets the tile is tearing back and it looks like it has been cut, also I recently had the landlord come in to repair drywall in there ( due to a leak). The repair man took the baseboards off and he was sanding around in the closet . So my question is could the fibers have been released into my house? when they go to tear out the asbestos is it safe for my children and I to stay there? and lastly could the rubber base board contain asbestos in the glue?
- Kayla
A
Geez……that’s so not good. You should not be there when it is being removed. I would talk to your landlord to see what he is willing to do about all this since your belongings shouldn’t be in there either (the asbestos particles can settle back down onto your furniture and such if the particles become airborn).
If your landlord intends to have the tiles removed while wet, that’s a different story, as wet removal keeps the asbestos from becoming airborn.
I wouldn’t have a clue about the baseboard or the adhesive containing asbestos – the only way to know would be to test it.
Hard to fathom how something built as late as 1985 had asbestos tiles installed. So glad your landlord cared enough to check into it!
- The Flooring Lady
Q
My tiles do contain 30 to 40% asbestos in it.. The landlord now wants to cover over the exisiting floor with new stuff, instead of tearing out the asbestos containg flooring.. I am a little concerned about this, because the flooring is fraile and ripping back.
If the flooring is fraile and torn back, could it release any fibers in the air??? I did also metion my townhouse was built in 1985 ( which i thought asbestos was baned than) As well who could i contact to get my quality of air tested in my home. I am from vancouver canada.I am extremely concerned for my childrens saftey as well as myself because my son just got diagnosed with active airway disease.
- Kayla
A
Gee, that is not what I wanted to hear. I don’t know when Canada banned the use of asbestos, in the US it was in 1972. In the US we have the EPA – Environmental Protection Agency. There are mandated rules and regulations for removing asbestos-containing material and it’s disposal. I would presume that Canada has a very similar department as well — they should be able to supply you with what the law is in Canada.
Yes, if the flooring is frail, crumbling and such, fibers could have been released into the air. I would urge to speak with your son’s pediatrician (or specialist if he has one) about your concerns as well.
I did find a link that might prove useful to start you on your path of arming yourself with information: http://www.hc-sc.gc.ca/hl-vs/iyh-vsv/environ/asbestos-amiante-eng.php
See also: http://en.allexperts.com/q/Residential-Property-Management-2151/Asbestos-backing-lino-flooring.htm
In my opinion, it sounds like you may want to consult an attorney, though I’d suggest talking to a governmental agency or doing further research.
- The Flooring Lady
Q
I’m laying down some laminate flooring. the entry way has this stone colored vinyl. Before I got here I went ahead and pulled the vinyl up but parts of its backing, white or off white, stuck to the plywood floor sheathing. I used a hairdryer for a little bit and scraped some of it up. I gues I may have messed up big time huh? Is testing the sheet and backing the only way to know? The house was built in 1976 and is a modular home.
- Richard
A
Hi Richard
Gosh, let’s hope not. Yes, testing it is the only way to know for sure. I would think that modular home manufacturers used so much flooring product and were probably watched more closely in regards to using materials with asbestos, so I would tend to think that they would have been more diligent in making sure they didn’t use anything with asbestos containing materials. Better to have it tested than to always wonder & worry.
- The Flooring Lady
Q
We have a beach house, built in 1956. It was evident the shower had been leaking for some years. I began pulling up the ugly (1970’ish) vinyl (soft pliable sheet flooring)in the bathroom expecting to find oak floor like the rest of the house. Underneath the decomposed particle board was what I would call hard sheet linoleum. I got a little ambitious and began removing the rest of the vinyl and particle board through the laundry room and into the kitchen. It occurred to me half way through that the vinyl flooring on top may have asbestos. Is there a way of determining this myself. The vinyl did not come up in sheets but tore easily, sometimes separating from the paper. I have not removed any of the materials from the house.
They are in a pile on the remainder of the kitchen floor. I’m concerned now that the top layer vinyl may have asbestos. I would be certain that the bottom layer linoleum was original to the house. I was planing on painting the original with an epoxy floor paint. Do you have any suggestions? Can I take a sample to a lab to have it tested?
- Mike
A
Yes, you can buy a kit to send a sample to a lab to determine if the flooring contains asbestos. You can find these at most hardware or big box home improvement stores.
Old asbestos flooring can that isn’t frayed, chipped or broken is considered ‘safe’ if you use an epoxy floor paint, sealer, or new vinyl, lino, tile flooring (etc) over it.
- The Flooring Lady
Q
My house was built in 1978. So, I do not have to worry about asbestos….right??
- Wheady
A
That would be correct.
- The Flooring Lady
Q
Lowes policy does not allow their sub-contractor to remove our linoleum (could be vinyl)flooring which is underneath the existing Pergo. Our home was built in 1997 and the contractor said there could still be asbestos in the flooring or the adhesive. We purchased the laminate flooring just under a year ago and installed the majority of it ourselves in the living room and down the hall.
We wanted the remainder to be installed by the professionals at Lowes as there are some tricky angles in our kitchen and dining room and we don’t want to deal with moving the large appliances or ripping up the two layers of floor. We want the new floor to be installed on top of the subfloor, NOT over any existing floor since one of our goals is to eliminate the transitions which we continually trip over.
Lowes also informed us that the contractor cannot hook our gas stove back up upon completion of the job yet the contractor told me not to worry about it and that he hooks them back up all of the time?! How does it make sense that they can move the gas range and unhook it from the gas source and *somehow* that is less of a liability than hooking it back up?!
I even spoke to our gas furnace maintenence guy and he agreed with me. I really don’t think there is asbestos in our house; I think the contractor doesn’t want to deal with ripping up the vinyl. I even tried asking him if we could pay him as a separate contractor (not Lowes) to rip it out and he said that part of his contract with Lowes is not to take and “side” jobs and he could lose his contract with them…guess he’s not worried about that when it comes to hooking up gas stoves! Is it likely that there is asbestos in our floor? Wouldn’t they have had to reveal that in either the disclosure or the inspection when we bought our house?
- Tammy
A
Grab a second opinion and find someone who is willing to work on your floor! In 1989 the United States Environmental Protection Agency (EPA) issued the Asbestos Ban and Phase Out Rule which was subsequently overturned in the case of Corrosion Proof Fittings v. U.S. Environmental Protection Agency, 1991, meaning their are some consumer products that still contain legal trace amounts of asbestos. You can read more on the asbestos ban here http://www.epa.gov/asbestos/pubs/asbbans2.pdf
Again I would grab a second opinion from a local professional and perhaps consult your Realtor regarding what they are legally required to disclose.
- The Flooring Lady
Q
Help! My house was built in 1972. It had carpet in the Kitchen and Dining area (Kangaback) I removed the carpet on the kitchen side yesterday. The foam backing had stuck, so I scraped on it in a couple places. It was slow going, so I covered it up with a towel, went online and learned that my 12″ tiles (original) could have asbestos! Today, I soaked the foam and removed it easily. If my tiles do contain asbestos, is there at least a layer on the outside that isn’t? I have a toddler that I am concerned about. Thank You
- Julie
A
The old asbestos tiles were made with asbestos in them, and are not suppose to be dangerous UNLESS they are damaged (cracked/open/crumbling). But, I would have it tested to be sure.
If they are not damaged, you may want to re-cover them. Rather than try to remove them.
- The Flooring Lady
Laying & Refinishing
Q
Hi, I live in a home built in 1900 an recently went to Lowe’s to purchase new carpet to go over old sheet vinyl in a spare bedroom but after having the measurements done the installer told Lowe’s they wont install the carpet until I remove the old floor and have it re-inspected. Lowe’s stated this is how all of their contractors are. The floor is in great shape since it sees little to no foot traffic, should there be any reason why not to just lay the carpet? thanks
- Jeff
A
Hi Jeff
………and have it re-inspected for what?? Asbestos? Are you saying that it’s been inspected for asbestos before? What were the results?
I can understand a contractor’s concerns about asbestos flooring – I wouldn’t want to work on it either – I’d be wanting to see test results to assure me that it does not contain asbestos – it’s too great of a health hazard.
It doesn’t cost much to have a test done — Lowe’s should have home testing kits available, you put the sample in a vial and send it off to be scrutinized under a microscope.
- The Flooring Lady
Q
Hi again, No the floor was never tested for asbestos, the contractor just visually looked at the floor and stated the floor contained asbestos and refused to lay any carpet in the room until the floor was abated and the installer had a chance to re-inspect the room to make sure it meets their standards for abatement and safe work conditions. I have since sealed the floor with an epoxy floor coating and hired another company that saw no problem with stretch fitting in carpet over the existing flooring.
- Jeff
A
Pfft! Nobody can tell for sure if there’s asbestos without having it tested. Sealing it with the epoxy floor coating was good – if there’s asbestos, this will stabilize the flooring, hence, taking care of any hazard. Good job!
- The Flooring Lady
Q
Our home was built in 1979 and we want to install tile flooring where linoleum currently is. We do not believe this is the origial linoleum. Do we need to worry about asbestos? Can we install the concrete board right on top of the linoleum, or should we remove it first?
- Laura
A
Hi Laura, I wouldn’t take any chances if there is a concern that there might be asbestos. You can have it tested to determine if there is asbestos and if there is, you can have it removed. If the vinyl is damaged in any way, you must have it removed before laying new floor.
- The Flooring Lady
Q
I have two layers of old vinyl with a layer of plywood in between them on my kitchen floor. Under it all is what appears to be nice hardwoods. I would really like to remove the vinyl (which I am pretty sure was from before 1972). I know the hazards and can figure out how to remove it safely..My question is when I am done, and I have nice hardwoods covered with glues from the flooring, is there a safe way for me to sand and refinish that hardwood floor?
- Steve
A
I would be sure to get a test kit or have a local contractor test the tiles for asbestos first. If the tiles on the hardwood floor are made with asbestos, it may really be a health risk to attempt sanding this yourself. I do not know of a safe way to accomplish it without a professional. If they aren’t then you should be able to sand or screen the wood floor and finish it.
- The Flooring Lady
Clean Up
Q
I took up an old floor, about 55 sqft of vinyl tiles form the 60’s. they where brittle and and broke easily. I am now convinced that they contained asbestos, looking at the edge of a broken piece with a magnifying glass you can even see the chunks of mineral in the tile.
To make matters worse, the floor was swept and vacuumed. What is my best course of action now to clean the room? The whole house?
- Jim
A
Hi Jim
Sorry to hear you have entered the “Asbestos Zone”. You have clearly stirred the fibers up. I think you need to call an expert team to see what their recommendations are. Chances are they will say they need to come in and do a HazMat clean up. Be sure to ask lots of questions about what they are going to do and what that’s going to accomplish for you.
Good Luck!
- The Flooring Lady
Vinyl Installation
Sealer
Q
We would like to lay beveled vinyl tiles and put something into the beveling that would make it look like grout. Is there a colored sealant or something else we could use ?
- Pat
A
Interesting concept. I don’t have any experience with such an approach and my gut level tells me it’s not going to work as well as you’d like because of trying to mix two very different products.
Let us know what you do. And if anyone knows of such a product and approach, please chime in.
- The Flooring Lady
Q
Im about to lay adhesive vinyl tiles and was wondering was there any clear sealer or anything to put on top of the tiles to make sure they last longer and keep from peeling back or popping up?
- Jason
A
To keep them from peeling or popping up, you need to make sure that you use good adhesive, apply it properly and have your subfloor as even as possible. You can always seal your new floor with a water-based polyurethane.
- The Flooring Lady
Q
I want to apply peel and stick vinyl tiles on top of vinyl tiles that have been in my kitchen for more than 25 years. In your comment to Jason B in 1/09 it appears you were saying it is OK to use a good adhesive in addition to the peel and stick. Is this correct? Thank you
- Regina
A
Hi Regina
Not necessarily – it depends on how good of an adhesive the tiles have. You can use additional adhesive if you feel the tiles’ adhesive isn’t going to work well.
- The Flooring Lady
Cleaning/ Glue
Q
when we had our vinyl installed by lowes there were tons of bubbles all over the vinyl and you can see the places where they silt the vinyl to let out the air in the bathroon but the vinyl is still not sticking in both the bathroom and the kitchen what can we do about the bubbles and the slits?
- Ashley
A
Ouch. I don’t want to imply all big-box stores have less than professional installers, but I have heard several horror stories, yours being one. Without having seen your floor installation my reaction is that Lowes can de-install it because they did a bad job of the installation and of their attempted repair.
Yes, slitting the bubbles can fix the problem, but if you have as many as you say you do, that many slits is bad news! And the bubbles are an indication of a bad installation or a bad vinyl. Either way, I’d get rid of it and start again.
- The Flooring Lady
Q
I’m currently having glue down vinyl tiles installed in my kitchen and all bathrooms. When I looked at them today, (the installers are 30% finished) they looked crooked, the butts didn’t meet and I could feel a slope as I walked around the room. I told them that I was not happy and that they should fix it so they took up part of the floor, reapplied some tiles and re-leveled some of the floor. How worried should I be? These same guys are supposed to install my laminate in the living room next week but I won’t let them touch it if they do a crappy job on the vinyl. Does it take vinyl a few days to “look right” ? Should they have been using something (like a seam roller) to make sure the ends butt and stay down?
- SW Girl
A
I can see why you are concerned, and it seems that your misgivings are well founded so far. The tiles should be rolled for miximum adhesion and the correct type of adhesive needs to be used as well. There is usually a time frame associated with the adhesive for rolling to insure that you get the max adhesion.
The first line of tile laid must be perfectly straight, if it’s not it’s just going to look crooked throughout the whole room.
The subfloor needs to be smooth as well and clean - something as small as a grain of sand could show up as a small bulge underneath the tile. All joints and holes in the subfloor should be filled with floor patching compound and sanded smooth.
- The Flooring Lady
Q
Well, Flooring Lady. After inspecting my vinyl to see they did do a decent job after all(after my two complaints) I decided to allow them to lay the laminate. I watched carefully as they “leveled” (without the use of any leveling tools) the floor.
Then they started laying the laminate and it looked great! However, I have noticed that there is one small spot (about 2 ft by 3 ft at the end of a short hallway that was obviously not leveled at all. I know this because I can feel a slant and a dip in the floor while walking on it, and if you watch someone walk on it the boards cave in a bit. It is obvious and can be easily seen with the naked eye.
I still owe the flooring guy 30% of his bill. I am trying to decide what to do? I am sure this needs to be fixed but I am unsure that his workers have the skill to do it. Should I ask him to fix it? Withhold an appropriate amount of money and pay someone else to fix it? Do you even think its a real problem? By the way, thank you so much for your previous answer. It was a real help.
- SW Girl
A
Hello again and thanks for letting me know how things went!
I do have a question – at the end of the hallway, does it end at a wall or at a doorway? Just asking because if the end of the hallway is an entrance to another room, then they might have had to slope it a little so that the flooring levels where it meets would be the same.
If this isn’t the case, then I’d ask the owner about it and tell him of your concerns. Invite the owner over to visit and see for himself as well. And no, it shouldn’t visibly ‘cave’ when somebody walks on that spot.
It probably won’t do you any good to withhold payment of the balance, he can always take you to small claims court to recover the rest of it. Of course, you’d get to tell your side too. If you feel you are perfectly justified though………
Chances are though, if he cares about his reputation, he’s going to want to see it and want to make his customer (you!) happy. It shouldn’t take much time or money on the owner’s part being as how it’s such a small area.
- The Flooring Lady
Q
Hello. My husband and I have started our very first do-it-yourself project and want to tile our basement floor. We have torn up the old tile and have noticed small divits in the cement underneath. Will it be necessary to fill those in and, also, do we need to sand the floor to remove the glue remenents(our surface is pretty smooth for the most part)? Thank you!
- Denae
A
Yes, you’ll need to fill in the low spots and remove the glue remnants to avoid having your tile look like it has air bubbles underneath. The worst part of your job is getting your basement floor ready for the tile. Good luck!
- The Flooring Lady
Q
Hi! We just layed peal and stick vinyl tiles, and some of the tiles are floating apart leaving a little gap between tiles. What causes this and what can be done. Ive alined them several times and if someone walks on them they seperate. The glue hasnt cured yet and it been 4 days since we layed them.
- Karen
A
Karen, we are presented with multiple scenarios. Not knowing where the tile is laid, the adhesion process would be disrupted if the room has a high moisture content.
Now for another scenario. It could be the adhesive is not strong enough or even perhaps it is faulty. I would suggest you do 2 things if this is the case. One call the manufacturer and inquire what they can do for you as the tiles are slipping! Two if the product is what it is then use additional adhesive to stick them down. When reinstalling if you chose to use additional adhesive and have questions re-read this particular article for my instructions on using “glue”. I also recommend using Bostick's Best Glue has I’ve had great success with it in my own flooring projects.
- The Flooring Lady
Q
Great article – very helpful. I’ve removed carpet from a basement bathroom that was glued on. I’ve scraped the concrete three times, using warm water, to get the old carpet and glue off. There still seems to be some glue “tracks.” Exactly how clean does it need to be before laying self-adhesive vinyl? (I’m getting really tired of scraping!)
- Ron
A
You mentioned glue tracks and I’m curious if they are stains in the concrete from the glue or residual glue. The stains won’t hinder adhesion although you do need to make sure the surface is free from any existing glue and debris. Without being there to see if the track is glue or a stain I would say use your best judgment.
- The Flooring Lady
Adhesive
Q
Can I use an extra adhesive to the peel and sitck graoutable vinyl floors to ensure that they don’t start to pop up?
- Dawn
A
Hi Dawn
To tell you the truth, I don’t know! You can call the manufacturer and ask them.
Feel free to drop back in and let us know what they said.
Q
I am the same person with the door in the middle of her bathroom. Can I lay the vinyl on the floor without any adhesive then roll back half of the floor, put the glue down then roll the vinyl back? I am worried that if I cover the entire floor with adhesive first I might not be able to situate the vinyl properly because of the darned door.
Also, any tips on floor preparation? I removed the old tiles becasue some were cracked and missing but now there is this sticky black stuff showing.
- Darragh
A
You can, but make sure that you don’t trap any air bubbles. It really is much easier to start from one end. The glue has to cure, so you’re going to have time to mess with the floor.
As far as the old black adhesive, heat and water does miracles to loosen it to where you can just scrape it off. Use a steamer or a damp rag and run an iron over it, sometimes just hot water does the trick. There are also adhesive removers that can be purchased, but most of the time you don’t need to.
Even though it’s a small area, you should rent a floor roller – it doesn’t cost much and going to help enormously with the end result.
- The Flooring Lady
Q
We opened the vinyll last night and the instructions that came with it did not mention any adhesive! It said to lay the vinyll and then attach the baseboards. The baseboards would keep the vinyll in place. What do you think?
- Darragh
A
I’m guessing that “lay” means to use adhesive unless there’s something new that I’m not aware of. What’s the name of the product and who makes it?
- The Flooring Lady
Q
Hi, This weekend I layed new vynil on my old vynil in my kitchen and laundry. It’s been 48 hours and the adhesive has not cured yet. When you press into the floor it can still make a small indention. Is there anything that can be done? Or do I just need to keep waiting and hope it dries eventually?
- Jason
A
Nothing much can be done at this point except for waiting……… You used the recommended amount of adhesive I’m sure, right?
- The Flooring Lady
Q
Yes I did. I was wondering if you should actually use less when applying over the old vynil instead of a more porous surface like wood or concrete.
Is there a maximum time for waiting, or should I just wait as long as it takes? Thanks for your help.
- Jason
A
It would depend on what the manufacturer recommends. Is there a phone number to call on the can?
- The Flooring Lady
Q
A Lady that I am working for purchased Armstrong Commercial tile to be put down in bathroom. No directions on box. What adhesive should be used to fasten it down?
A
It will depend what the tile is going on. Cement, wood, what? You can visit Armstrong’s site, see what’s recommended or find their phone number at the site and call them.
- The Flooring Lady
Q
very helpful post. I’m about to lay a vinyl tile floor over concrete. I’ve scraped, cleaned and dried the concrete and purchased an adhesive (in addition to the peel-n-stick on the back of the vinyl). My primary question is this: do I have to use both adhesives?
The poured adhesive seems to require me to allow it to dry completely (overnight?) and then begin to place. Unfortunately that would mean I had to begin at the edge of the room and work toward the center rather than the correct manner of middle-outward. HELP, please! AND thanks so much for all this helpful information I’ve already read!
- Margaret
A
If your vinyl tiles have an adhesive back, then you do not have to use an additional adhesive. Just peel off the backing, put the tile in place and push firmly.
Prep & Fix
Q
Hi , I am thinking of laying vinyle roll flooring in my bathroom ,can you lay it straight onto tiles.?
- Mel
A
You can, but you need to make sure you evenly fill in the depressions where the grout is first – and in the tile if it is textured.
- The Flooring Lady
Q
My bathroom has a door in the middle of the room separating the sink area from the toilet and shower. How do I lay sheet vinyl? Do I treat the area as two distinct spaces or do I attempt to lay one continous piece of vinyl? Any tips?
A
As much as a pain in the butt this will be, yes, attempt to lay one continuous piece of vinyl. Helps to make a template out of paper or posterboard to use as a guide (tape them together of course!). Makes the job a whole lot easier.
You can also draw the area on a piece of paper, measure every little thing and write the measurments on the paper where they correspond with the picture you drew, then use that to cut the vinyl. It’s better to cut out not enough – that way you can trim the vinyl where needed for a better fit.
- The Flooring Lady
Q
You’ve likely heard this question before. I’ve begun installation of peel and stick vinyl tiles on my concrete basement floor. After installing perhaps 80 or 90 so far, 2 or 3 of them are exhibiting bubbles or bulges. The boxes of new tiles were left in the room for at least 48 hours prior to intalling.
Is there any simple fix? Is it possible to install a tile too tight? I’ve been trying to butt each tile against its neighbor with a straight edge. Is it possible to overdo this? Thanks in advance.
- Bill
A
It might be possible to get them too tight. It sounds more like you either have pockets of air or specks of dirt, or raised areas in the concrete itself. Apart from peeling those tiles back up and putting down new ones (and hopefully discovering what caused the bubbles) I really wouldn’t know of any other fix.
- The Flooring Lady
Q
hello! i want to ask if i need a smooth concrete surface before i put vinyl tiles. I am planning to put vinly tiles on our concrete wall but the wall is rough
- Ana
A
Hi Ana
This is a flooring site, but I’ll give you my best guess pertaining to walls. Keep in mind I don’t know what you consider ‘rough’ to be. Chances are though, that the adhesive you use for the tile will do well despite the roughness of your concrete wall. You really should confirm this with somebody who has experience with setting tile on concrete walls though.
- The Flooring Lady
Q
We have two layers of linoleum on our floor. We now want to install a Fiber floor. Can it go over these two layers or must they first be removed? Thanks for your help.
- Ruth
A
What kind of a fiber floor are you wanting to install? Basic rule of thumb: as long as your floor (with the 2 layers of lino) is level, then you can install over it. It’s still better to remove and start fresh.
- The Flooring Lady
Brands and Types
Q
Is it true that patterns of an old floor, like linoleum, can come through into a new floor if laid over the top? I’m currently laying 1/8 inch TrafficMaster groutable vinyl tile from Home Depot in our kitchen, and this was brought to my attention.
- D Fischer
A
Occasionally, but this rarely happens. It can happen if there is a strong texture in the old floor. Usually, people just get some thin subfloor to lay on top, then add the new flooring. Another approach is to use something to even out the texture.
- The Flooring Lady
Q
What flooring is better over all Vinyl or Fibre?
- Tracey
A
It really is just a matter of personal preference and where you are planning on installing the flooring.
The main drawbacks of fiber flooring is that are absorbent and stain easily. The usually are not as soft as synthetic floors and they don’t typically do well if exposed to dampness.
So consider where you will be installing the flooring and what kind of traffic the area receives.
- The Flooring Lady