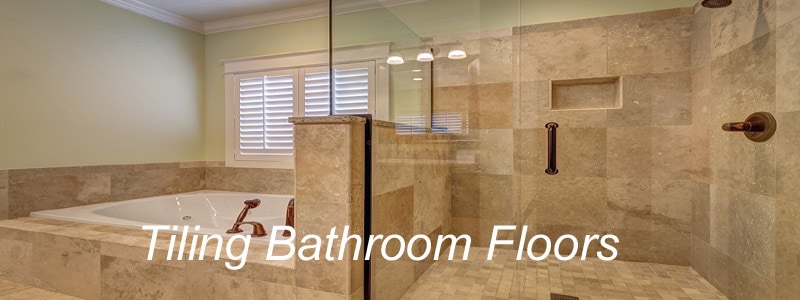
You may wonder how to install bathroom ceramic flooring; tiling bathroom floors is the same whether you are using ceramic or porcelain tiles. The details of how to lay slate flooring in the bathroom isn’t much different from ceramic tiles. Installing bathroom flooring, whether you are tiling bathroom walls or floors, takes planning and careful execution. After you grout ceramic bathroom floors and let it dry thoroughly, be sure to put a sealant on the floor to waterproof the grout and minimize staining potential.
Tiling bathrooms floors takes planning and can be time-consuming but the results are dramatic and well worth your while. Ceramic tiles can be laid in unique patterns, shapes, colors and textures, which allows you to personalize your bathroom and fit your own style.
The surface of bathroom floor tiles is normally glazed but unglazed is also available. The strongest tiles are those that are thicker, larger, and darker on their underside. These tiles are the most durable and are less likely to break when being installed.
Preparing Your Bathroom For Installation
Once you have chosen your tile, you must determine how many you’ll need for your project. To do this, measure the length and width of the tile, and the length and width of the room. Divide the length of the room by the length of one tile, and divide the width of the room by the width of one tile. Always remember to round up to the next whole number when dividing these numbers. Now multiply the two whole numbers together to get the total number of tiles needed for your bathroom. We recommend buying a few extra tiles in case of breakage during installation or future damage that may be hard to match later.

Before you start laying the tile, plan your design and lay it out on paper, taking into account the fixtures. The pattern should work around the fixtures and not interrupt the design, which is especially important if you are using different shapes or have an intricate design. Since the level of the floor will be raised once the tiling it laid, it’s important to remove any floor-level cupboard doors and any inward swinging main doors. The height of these doors will have to be adjusted before re-hanging to accommodate the height of the new floor.
You’ll need straight lines on the floor before you begin to ensure the tiles will be laid straight. You can do this be either laying the tiles out onto the floor and drawing in layout lines, using a string nailed to the floor or making a chalk line with a chalked string. Starting with a clean sub-floor, spread the waterproof adhesive from the center of the room using a notched or plain trowel (as directed by the manufacturer). Spread enough mortar for about 10 tiles within one section, holding the trowel at a consistent angle. If you have layout lines on your floor, be careful not to cover the lines with the adhesive. The adhesive should be at a uniform height so that the tiles can lay perfectly flat. If your bathroom has a drain, make sure to gently slope the mortar towards the drain.
Installing Your Ceramic Tile Floor
The proper placement of the first tile is vital because its position will influence the placement of the rest of the tiles. As you set the remaining tiles, align them with your layout lines or string, and keep a consistent space between the tiles using plastic spacers or the spacing lugs that come with the tile. The plastic spacers or spacing lugs will ensure that you have straight and even grout lines between the tiles.
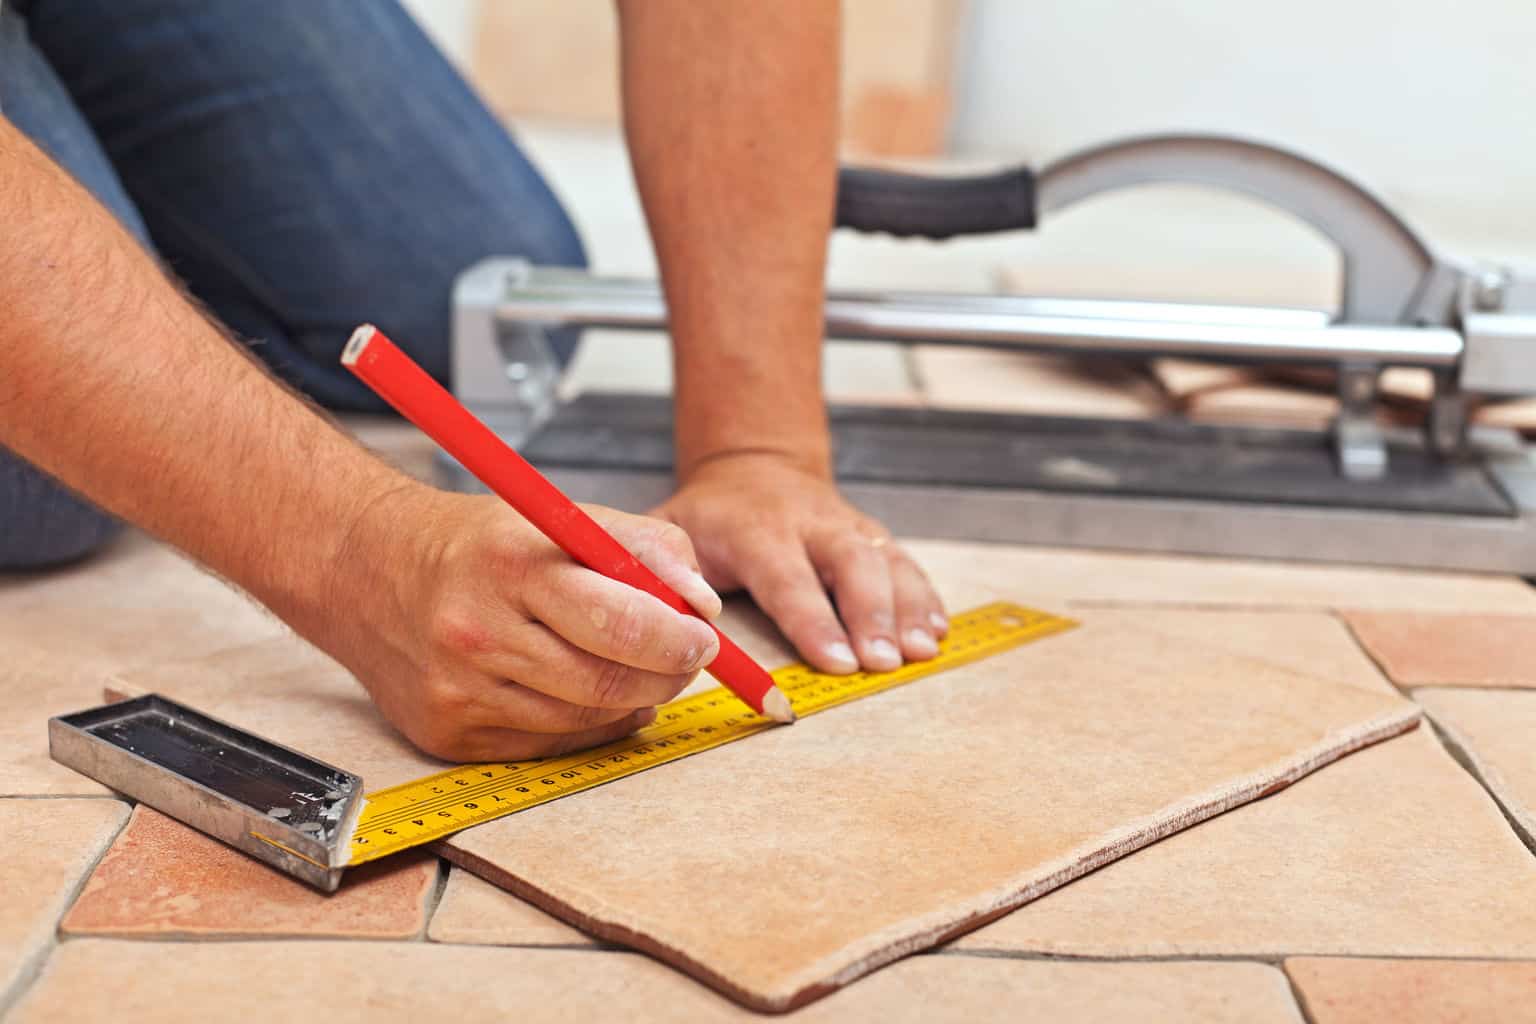
As you lay the ceramic tile, constantly use a level to check the horizontal level. You can use a rubber mallet or a 2×4 and a hammer to gently level the tiles. After setting your first section, clean up any adhesive that has leaked up between the tiles with a pencil or putty knife and clean the top of the tiles with a sponge. Plus, remove the spacers used between the tiles. Repeat this process until the full, uncut tiles are all set and allow to dry for 24 hours.
Once the full tiles are set, the border and detail tiles can be measured, cut and set using the same process. Since the walls may not be square, each tile should be measured and cut individually. You may find that the perimeter space or small detail areas are too small to lay the adhesive onto the sub-floor. In this case, you’ll need to spread the adhesive directly onto the tile itself.
Once all the tiles are laid, the floor can be grouted. Using a plastic scraper, push the grout between the gaps in the tiles, making sure to apply a uniform coating. The grout should be smoothed between tiles so that it is smooth and even. Wipe the grout off the tile surface before it sets up because removing it after is much more difficult. A few days after the grout has totally dried, wipe the floor surface with a dry cloth and apply a silicone sealer to preserve the grout.
Installing bathroom flooring with ceramic tiles takes planning and some skill. If you take your time and have fun with it, your new floor will change the look of your bathroom and will last for years.
I want to tile my kids bathroom,it has a vinyl flooring in it now my question is ,do I have to remove the toilet and cabinet and the vinyl before I start? Its a modular home and I dont think it has a hardbacker under the vinyl.
Hi Julicia!
Yep, you gotta remove the toilet & cabinet…. sorry, but there’s no way around it.
Do you think the tile will adhere ok to the vinyl? I don’t know anybody who’s tried, so I haven’t a clue.
If you’re wanting to use hardbacker board, just remember to use a mask & goggles – when you cut it, the dust has silica – not healthy. Try to cut it outside or in a well-ventilated garage.
I have tiled over vinyl flooring several times. No problem with adhesion AND if you ever go to change the flooring it is a lot easier to get the tile up. Where my house was tiled directly over the slab, getting the oud cement up was very hard to do and costly to rent expensive tools. Tile over the vinyl and save yourself time and money now and in the future.
If you hit a place where the flooring is not level, as in someplace the vinyl was not and now you want tile there, just use more mastic and level up the tile. Or purchase any cheap vinyl and lay it down first and tile over that also.
Thanks for you input Ginny. Also need to keep in mind the weight of the tile that’s being put down. Chances are the floor will be sturdy enough, but there might be a case or two where it isn’t and the supports will need to be beefed up a bit.
I have used self stick tile in my bathroom. my problem is water from the bathtub is getting through. what can I seal the floor under the tile with?
Hi Laurie,
You can’t seal the floor under the tiles because the tile is already stuck to it. If the water is making a little stream at either end of the tub, there are these triangular shaped things that stick to the corner of the wall & tub to prevent this. Sorry, I don’t know what they’re called, but they deflect the water.
Are there any pros/cons to laying tile flush rather than using spacers(1/8 or 1/4)?
Hi Greg,
It’s more to aid in expansion/contraction so that you don’t get cracked tiles. It’s not always necessary, but is recommended.
In a commercial bathroom with floor drains, is it easier to create pitch with smaller 2×2 tiles or larger 8×8,12×12, etc.?
Hi Jay,
Honestly, I don’t know. I would think with smaller tiles as the larger ones may crack. Sorry for the lame answer, but I’m not familiar with commercial issues and face it, most home bathrooms don’t have drains in the floor.
I want to have two adjoining rooms to be tiled with different tiles. One room the 12″ X 12″ tiles and the other 16″ x 16″ tiles. Should I just have them separated with grout or should I use a border to separate the rooms?
Gina,
That is really a personal decorating choice. I would choose what you will be the happiest with.
Great advice! One question though, do you recommend laying down backer/cement board before tiling a bathroom or is the 3/4″ plywood subfloor good enough. I’m concerned the plywood may flex and lead to cracks in the tile down the road.
Zach,
I believe you are right and that a cement board would be better to use.
Speaking with a specialist, or the tile manufacturer for suggestions would be the best idea.