Vinyl flooring styles have changed drastically through the last fifty years, and if you are tired of your old vinyl flooring, you can consider replacing it. First, you need to decide if you are going to floor over it or remove it.
In many cases, new flooring can be laid directly over top of your existing vinyl flooring.
Check out our reviews and comparisons of the best vinyl flooring for 2018!
This is typically the route I would recommend taking, as removing vinyl flooring is hard work and can be dangerous if the flooring contains asbestos, as many vinyl floors did prior to the 1970s. Be sure to learn how to tear out vinyl flooring before you tackle it
Are you tired of looking at that old vinyl floor that has been in your kitchen since the 1970s?
Then you need to remove and replace it! While the process of removing vinyl flooring is actually very simple, you will need a lot of patience and good old fashioned elbow grease, as the work is physical and time consuming.
There are so many different flooring choices available for you to use in the kitchen and changing the flooring can make a huge difference in the look and feel of your kitchen.
If you like the feel and ease of vinyl flooring, these days there are many modern and up to date patterns of vinyl flooring available on the market that can update your kitchen at a budget price.
Whichever replacement flooring you choose, you need to first evaluate whether or not the old vinyl flooring will need to be removed or not.
Covering the Existing Vinyl Flooring
Many flooring choices available on the market can be laid directly over your old vinyl flooring, as long as the floor is flat and even.
If there are just a few places where the flooring is uneven, you can build these places up with a floor filler to make the surface smooth and even.
If the flooring is very uneven, you can also lay down a new subfloor with a 1/4-inch piece of plywood and then install your new flooring on top of that.
Keep in mind that anything you add to the floors on top of your old flooring will make the thresholds that much higher too, which can also impact any appliances that fit under the counter, like your dishwasher or stove.
You will want to consider and account for this before you begin your work. You may also find that the height change between rooms may cause a tripping hazard.
It may be worth checking with a contractor to see what method they recommend for installing your new flooring and getting a few estimates on what a professional would charge for this.

Removing Vinyl Flooring
If you just can’t live with that old vinyl or are wanting to expose hardwoods underneath the vinyl, then you want to tear out the old vinyl.
Before you arrive at this decision, you need to know that tearing out vinyl flooring is a hard job.
Most of the time, it will take sweat and effort and several days of work to get up the old vinyl flooring as there is no magic way to remove it.
For this reason, unless it is absolutely necessary, you may not want to try to remove the vinyl flooring but lay the new flooring on top of the vinyl.
Checking For Asbestos
Before removing the vinyl flooring, you need to have the flooring checked for asbestos.
Vinyl flooring made in the 1970’s and before were made with asbestos backing, so you want to make sure that you remove it correctly for you and your family’s health.
A good rule of thumb is that if your home was built and the flooring installed prior to 1980, you should assume there is asbestos.
If you’re unsure, you can also send a sample of your flooring to a lab to be tested to see if it does, in fact, contain asbestos.
Before taking the sample, you will want to use a spray bottle to dampen the flooring thoroughly, as cutting into a material with asbestos in it can release the asbestos particles into the air and breathing this in is toxic.
Use a utility knife to cut through the entire depth of the material for samples of the requested size (usually about 1 square inch). Seal the area from which you removed the samples with duct tape in order to prevent asbestos dust while you wait for results.
Most labs will require that you send three samples for testing, and testing results can be back within 24 hours or as long as two weeks.
Alternatively, there are home-test kits available, but the price is typically comparable to sending the pieces off to a professional lab testing company and, as asbestos is nothing to mess around with, this is the route I recommend.
If your flooring does have asbestos, many times you can still lay existing flooring overtop as long as you seal the flooring layer with asbestos.
If you are removing vinyl flooring that has asbestos, getting an asbestos removal company to remove it is the best method of having it removed because they have experience and equipment necessary for removing asbestos materials and will know the best and safest way to remove it from your home.
Removing the Flooring
If your flooring was definitely made and installed after the 1970s, you can remove it yourself. You will want to start by removing baseboards and trim and all furniture and appliances so you can get to the flooring.
Plan to take a couple days to remove the vinyl, in most cases as the process is long and tedious. The good news, however, is that removing vinyl flooring doesn’t require any special tools or know-how.
The best way to tear out vinyl flooring is to pull up the vinyl and then go back and remove the remaining glue and pieces of flooring. For sheet flooring (or rolled flooring) or vinyl flooring tiles that are larger than 2x2 feet square, you will want to score the flooring into 12 inch strips to make it easier to handle and pull up.

If you are removing vinyl flooring from a wood subfloor, you don’t want to get it too wet as it can cause issues with the wood.
If, however, the vinyl flooring was laid over concrete, you can soak a 2x2 foot area of the flooring with warm water for about 5 minutes before scraping it up, which helps ease the process tremendously!
Heat about 1/3 cup of water in a microwave or on a stove top until it’s too hot to touch, but not boiling and pour this over the area you will be removing. Use a paint scraper to dig underneath the vinyl and then elbow grease to pull it up.
To remove vinyl flooring from a wood subfloor, you may want to try one of the following three methods:
- Warm Damp Towel: While you do not want to soak the wooden subfloor, you can lay a warm, damp towel over the flooring to soften in before pulling up the vinyl.
- Electric Heat Gun: Some people choose to use heat guns to soften/steam the flooring’s adhesive, making it easier to remove. Heat guns can be rented from most home improvement stores, but are also not particularly expensive. I’ve seen hair dryers recommended in a pinch, but truthfully these are not as effective.
- Iron and Towel: You can lay a towel over the vinyl flooring and run a regular clothes iron over it to heat the flooring and the adhesive making them easier to pull up. You will want to use a cheap iron you don't mind ruining, and the towel will also need to be trashed afterwards.
Electric Heat Guns Available on Amazon
Alternatively, some people just pull up the vinyl flooring without any pre-work. It is doable, especially if the vinyl is already peeling and the adhesive has broken down overtime, but a little pre-work to soften the vinyl will make the job significantly easier.
Whichever method you choose, keep in mind that this process is going to take some time and effort, but it will be worth it in the end! To get an idea of the method you want to use to scrape up the vinyl, take a look at this video.
Removing the Remaining Adhesive
Now that you have your flooring up, you are probably looking at adhesive still on your subfloor. Removing this will take some tools and time (we told you removing vinyl flooring was not for the faint of heart!).
Using a long handled chisel to scrape the adhesive up as much as possible is one way to remove the adhesive.
You can also use a heat gun like recommended above to soften the adhesive. Other experts suggest removing as much of the loose adhesive as possible and then laying the new floor on top of the remaining adhesive.
As long as you remove the loose adhesive and the rest of the surface is smooth, this should pose no problems for your new flooring.
To smooth the remaining adhesive on a wooden subfloor, use an electric sander with a very course grit.
Other options to make it easier to remove the adhesive left on the flooring include:
- Commercial Adhesive Remover/ Floor Stripper (such as Bostic)
- A vinegar/water solution of 2 parts vinegar to 1 part water
- Shaving cream
- WD40
- Dry ice
- Hot water
As with the vinyl flooring removal part, if your subfloor is wood, you will want to be careful not to soak the floor with any of the options above or let any of the solutions sit on the flooring for long, as this can damage the wood.
Finally, rent a shop vacuum to remove any remaining loose adhesive or vinyl flooring particles. You are now well on your way to having a beautiful new kitchen floor. All you need to do now is lay your new flooring and enjoy the look of your renovated kitchen. Your kitchen will never look or feel the same.
Proven techniques for removing linoleum and vinyl flooring
| If you’ve just moved into a new house, or you’re looking to change things a bit, you may be faced with removing linoleum or vinyl flooring. Removing vinyl or linoleum flooring can be more challenging than you want, but it may be worth the effort. |
Understand why you need to remove the flooring
There are several tricks of removing linoleum and vinyl floors, but first you should need to know why you are looking at removing your flooring:
- It’s out of date
- You’re just kind of bored with it
- The surface is “banged” up
And why haven’t you done it yet?
- You’ve heard that it’s hard
- You’re not sure what you want to do
Glued floors make the removal tough
If you’ve ever tried removing linoleum and vinyl floors, it seems that every layer just yields more and more frustration. Not only is the original flooring seem almost impossible to remove (especially with age), but also doing so can harm the layer underneath, making new flooring lay unevenly.
You might also find globs of concrete-like glue underneath, which may not be readily removable without the help of specialized cleaners for removing linoleum and vinyl floors.
The Removal Process
If you’re dead set on removing the old flooring, then it will take a bit of time. You can start with chipping away at the old flooring and using heat to soften the material or use one of the old tricks of removing linoleum and vinyl floors by cutting it out.
Start the process by pulling the linoleum or vinyl flooring by hand and once you get a chunk of the material out, use a razor knife to cut the vinyl into smaller strips, as it can make the work easier, instead of cutting an entire big strip.
You can utilize the help of another person to use a floor scraper to clean the surface underneath the vinyl flooring while you are cutting down the strips, as it can help speed up the process.
Remove the Adhesive
And once you have removed all the strips of linoleum or vinyl flooring, the only thing left is the adhesive, which needs to be removed or else the floor looks ugly.
A special chipper one of the tricks of removing linoleum and vinyl floorsthat can help you in the beginning, and a heavy duty adhesive remover will help when you get to the clumps of glue from the initial installation.
A lot of homeowners have been rewarded in their floor removing efforts with a nice wood (or other material) floor underneath. This can be stained and sealed and make for a beautiful home accent.
Get Creative
If this sounds like too much work, there are other tricks of removing linoleum and vinyl floors or if the surface can’t be saved, you may want to get creative and decorate it instead.
Place plywood on top of the damage flooring (adhering it) and install your new flooring to the plywood. Many homeowners are turning to covering the old flooring with new flooring rather than go through the effort and mess of removing the old flooring first.
If the surface is still usable, a coat or two of paint, using paint that adheres to vinyl and linoleum, can cover up the old design or color. Follow that with some urethane and you’ve got a new, beautiful floor.
Start a Fun Family Project
Another fun idea is to literally decorate what’s already there instead of using cleaners for removing linoleum and vinyl floors. Start with a clear coat of urethane, add some decorative items (glitter, coins, stamps, etc.), let it dry and then add more urethane.
This is a great idea to enliven a new kids play room or bedroom, or to add drama to the kitchen. Involve the kids in picking out the “fun stuff” and you’ve got a fun family project. Of course, the fumes can be a bit much, so they should probably just be in on the planning part.
Summary
If you’re starting with a clean and dry surface, you can start over in terms of your flooring options. Using cleaners for removing linoleum and vinyl flooring isn’t the only option when you’ve got a damaged or outdated floor. There are many hole fillers that can be used to create a smooth surface for painting, while the addition of some plywood can make what was old new again.
Don’t feel that you’re ever stuck with the linoleum or the vinyl flooring that you have — get creative!
Removing Asbestos Vinyl Flooring
Background and History of Asbestos Vinyl
Asbestos vinyl flooring was widely used until 1972. Vinyl is made from a combination of ethylene and chlorine that result into a plastic resin. Back then, asbestos was the additional component that improves its strength and insulating properties. Apart from vinyl flooring, asbestos was also used in wallpapers and ceiling tiles.
If the vinyl is intact, it doesn’t pose any threat. However, problems started to arise when floorings are cut, damaged, or get worn out through time. Back then, those most susceptible to having asbestos related diseases were vinyl factory workers, floor installers and construction workers.
Don't Guess - Test and Have Peace of Mind!
When the dangers of asbestos became an issue, then careful vinyl flooring asbestos removal became an issue. One option is just covering asbestos flooring with the new flooring material like carpet, vinyl tiles or sheet vinyl, laminate or hardwood flooring, or even ceramic tiles and stone.
Testing for asbestos in vinyl flooring can be done by professionals or by yourself to determine “is there asbestos in my vinyl flooring” or not. Asbestos in vinyl flooring isn’t the end of the world, but asbestos and vinyl flooring do cause concern for your health. Use precaution if you elect to remove asbestos vinyl flooring so that its potential doesn’t become your reality.
Read Reviews and Buy Asbestos Test Kit
Until 1972, asbestos was used in a variety of building material such as roofing, exterior siding, window sills and linings, and vinyl flooring. Asbestos is a group of minerals known for their strength, flame/heat resistance, and indestructibility, and was considered ideal for insulation and fireproofing. However, once it was discovered that asbestos fibers can result in severe illness and disease when inhaled, the use of asbestos was banned by the EPA.
How to Check if There is Asbestos Flooring in Your Home.
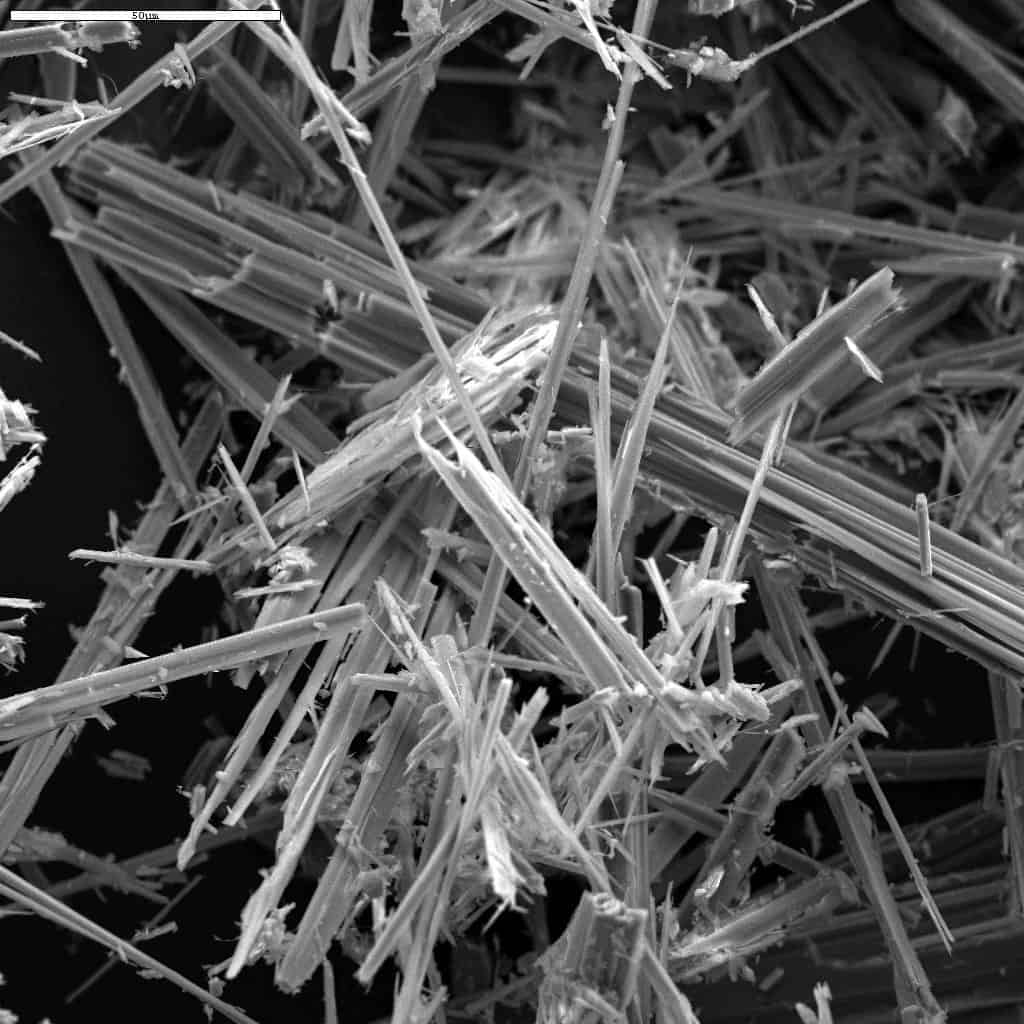
Unless clearly marked on the product’s label, asbestos is impossible to identify without examining a sample under a microscope.
A. Size of Tile
One easy way for you to know if it is an asbestos vinyl is through the size of the tile. Before the 1990s, these tiles were manufactured in 3 sizes: 9 x 9 inches, 12 x 12 inches, and 18 x 18 inches. At present, standard square vinyl tiles are only 12 x 12 inches.
B. Brand of Tile
If you can still find out which brand of tiles was installed, here are some brands that manufactured asbestos flooring: Excelon, Fashionflor, Flor-Ever, Gold Seal, KenFlex, KenTile, Sears and Solarian.

C. Laboratory Testing
Testing for asbestos vinyl flooring can be done by a professional asbestos contractor or by using a do-it-yourself sampling kit.
- First, you would need to cut off a portion of your vinyl flooring as a sample. Spray water mixed with liquid detergent on the area where you're going to cut the sample from. The mist will ensure that asbestos fibers will not dissipate into the air.
- Using a utility knife, cut a small strip of the tile, around 1/8 x 1 inch in size. Cut all the way to the bottom so you can include the backing and the adhesive in the sample.
- Place the sample into the bag and ship it back to the testing laboratory.
- Wait for the result and if the sample consists of more than 1% asbestos, then it means your floor does contain asbestos.
Your Options: Removal or Installing a New Floor On Top
If your asbestos vinyl flooring is chipped, crumbling, or frayed, it must be removed before laying a new floor. The asbestos fibers from the damaged floor can cause health concerns when the fibers are released into the air.
However, intact asbestos vinyl flooring should not be removed because the removal of an intact floor poses a greater risk than simply covering over the old flooring. Leaving the old floor as is will be the most safe action you could take because you’re not disturbing the asbestos in the material.
Considerations and Risks Before Removal
If you determine that the asbestos vinyl flooring must be removed, asbestos abatement contractors are highly recommended.
Homeowners living in a single family home may also remove the asbestos but legally, family members and friends who help must do so voluntarily and without pay.
Moreover, if you as a homeowner are not confident in your ability to safely remove the asbestos vinyl flooring, hire a certified asbestos abatement contractor. Asbestos removal is difficult work, and can be physically demanding and potentially dangerous to your health.

Asbestos fibers are up to 1,200 times finer than human hair and when inhaled, they can directly penetrate your lungs. Even after 3 decades of inhalation, asbestos can lead to lung cancer, mesothelioma, breathing problems and heart failure.
Even the slightest exposure to asbestos can be risky, that is why medical experts emphasize taking precautionary measures when dealing with asbestos in home improvement projects.
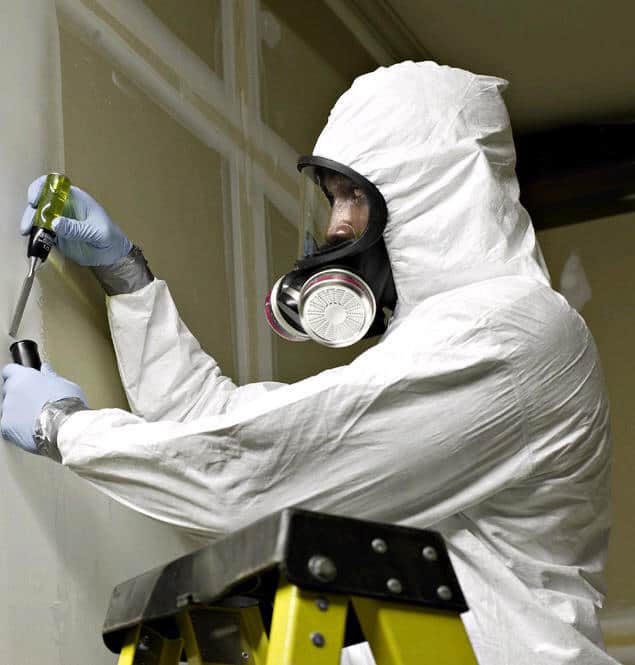
Tools and Gears Needed for DIY Removal
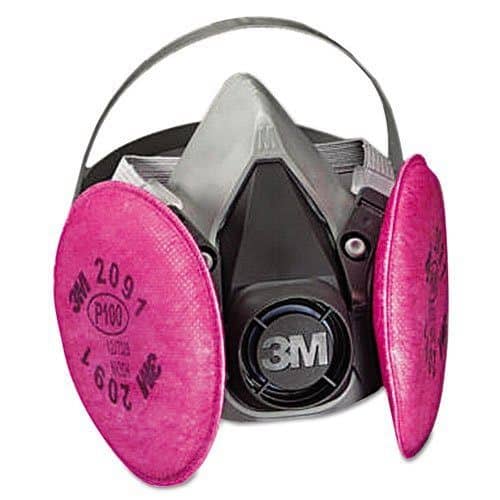
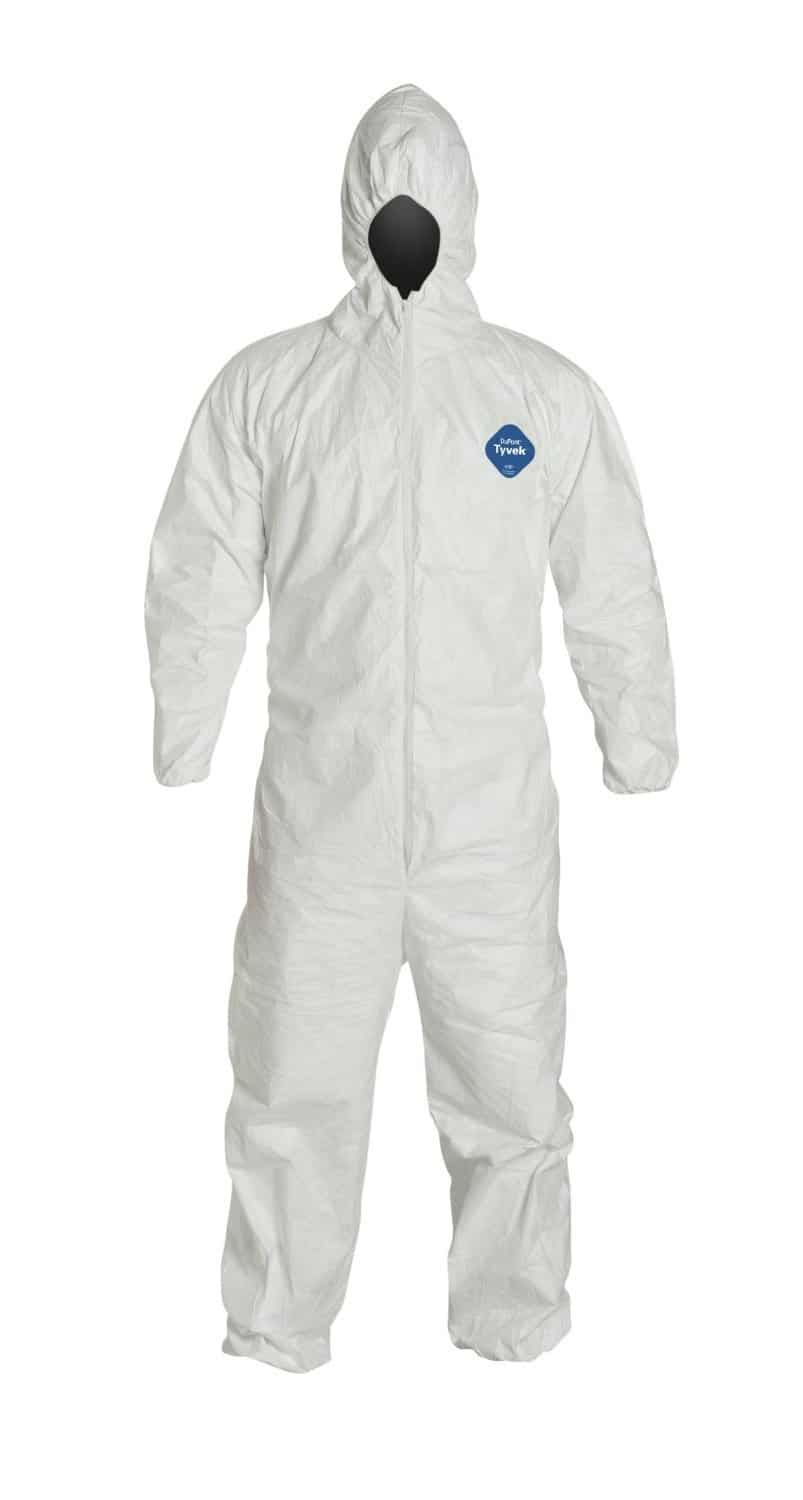
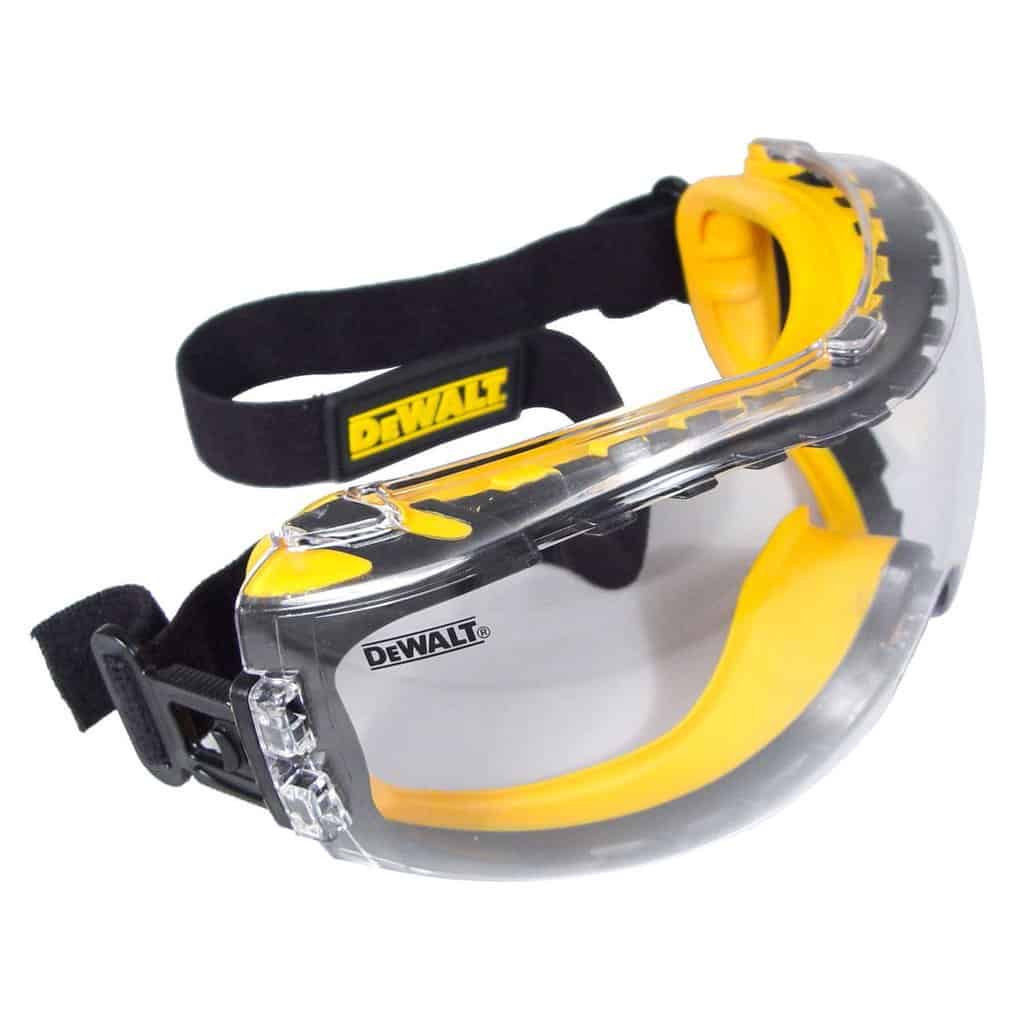
If you’ve accepted the health dangers involved, you can minimize the risk of exposure to asbestos fibers for do-it-yourself removal by wearing safety equipment such as a respirator, coveralls, gloves, rubber boots and safety goggles.
You need to fasten your gloves to the coveralls with tape, to make sure that they won't come off. Plus, tools such as spray bottles, liquid detergent, putty knifes, a utility knife, a still floor scraper, plastic sheeting, duct tape, plastic garbage bags, a mop, and disposable towels will be needed.
Check out this DIY video on how asbestos vinyl floor tiles are removed.
You can do better than the woman in the video by wearing the other required protective equipment. Note that breathing through a respirator can be challenging and the coveralls can be uncomfortable.
Removing the tiles on your own will be time consuming. On average, a 2 square-meter area can take around 1 to 2 days. Do take careful consideration before embarking on a DIY floor removal project.
Steps in Removing Asbestos Flooring
Step 1: Protect The Area
The goal in removing the asbestos vinyl flooring is to remove it in whole pieces without causing any dust.
- Before beginning, the work area must be isolated using the plastic sheet over heat registers, doorways, cupboards, ect. and the heating and air conditions system must be turned off.
- All furniture and other moveable objects should be removed from the room to prevent contamination and to simplify clean-up.
- Access to the work area should be limited to one doorway, with a slit in the plastic door covering to make the entrance as small as possible.
- Post a sign outside the house or inform your friends and relatives that they cannot visit the house at this time.
- Keep the pets away from the work area as well.
- To further prevent asbestos fibers from spreading, the floor must be kept wet using a water bottle. The water will also help loosen the tiles and make removal mush easier.
- Keep your supplies ready near the doorway, which includes water bottles, rags, buckets and trash bags.
Step 2: Removal
- Once prepped and your safety gear on, cut the vinyl flooring into the manageable sections with a utility knife, and remove the pieces by pealing from the edges and using a flat scraper to lift the vinyl.
- Continue to wet the flooring as you scrape and pull to minimize dust. Any vinyl backing that separates from the vinyl flooring can be removed by thoroughly wetting and scrubbing the floor with a pad.

Step 3: Clean Up and Disposal
- As you remove the vinyl, place the pieces in sturdy plastic trash bags to avoid leakage and mark the bags "Danger! Asbestos-Containing Materials." Regulation also states that you should write your last name, address and removal date on the trash bag. The trash bags should be 33 x 50 inches in size and should be 6-mil thick polyethylene.
- The asbestos debris can only be disposed of in a landfill that accepts asbestos-containing waste. Consider calling the land-fill before you go to ensure you understand all their requirements.
- Careful clean-up is important when dealing with asbestos, and all potential asbestos dust and particulate must be removed from the work area to avoid future asbestos contamination.
- Wet and remove all debris left on the plastic sheet used to cover the counters, furniture, and equipment. Then roll them carefully and place them inside the trash bags.
- Twist the top of the bags and then seal them with duct tape.
- Wipe all surfaces and scraping tools with a damp cloth. Frequently rinse the cloth and change the water so that the surface in the work area can get truly clean. Once you're done with the rags, dispose them properly.
- Collect all your tools and put them in a bucket or plastic bag, so you can clean them later.
- Next, stand on a plastic sheet and spray yourself or your companion with water to wash down any remaining asbestos fibers. Only then will you be able to remove your respirator, gloves, boots, goggles and coveralls.
- Place your towels, mop heads, and coverall suit and gloves in the disposal bag. You can dispose of the boots or place in a plastic bag for cleaning later. Remove the filters in your respirator and dispose of them
- To ensure that your skin and hair is free of asbestos, immediately take a complete shower and wash carefully.
Hi April,
Yep, regular ol’ hot water and a little elbow grease does wonders! ;~)
Stinky but worked like a charm for me. House has (had ha ha ha) big sheets vinyl over cement slab probably from early 70’s and must have paid for extra glue – about 800 sq ft worth. Bought two $30. scrapers from Lowes and started scraping. Could only get the very top layer (a little thicker then skin off the whole floor and was told by friend not good enough everything must come up). I felt the rest of the floor was laughing at me every time I hit it with the scraper every time I hit it said ha ha ha. I started looking on google and then cried some more. Tried scoreing, hair dryer, hot water and when tried scraping floor still laughing and me crying. Then success tried scoring and moping kerosine and I was able to scrape it off with no problem at all the next day. Now this is in a vacant house and was able turn the heater off open all the windows and mop the scored portion with the kerosine just before I quit working and locking up at night. Next morning ha ha ha on the floor was easy as peeling a potato, what a difference the kerosine made – night and day. I am sure this method is not advertised because of the fire hazzard. Lets see what the Flooring Lady thinks.
Hi Jim,
LOL! Good story! Not what I’d recommend obviously, but most houses aren’t vacant when the flooring is removed. Glad you were able to do it safely! I do hope there wasn’t any asbestos in the flooring or the adhesive.
What would be the best way to remove adhesive from hardwood floors? I got most of the glue off but some of it wont unles u dig in the wood and i dont want to do that
There are solvents that can be used, damp old rags and an iron, hot water (not the greatest thing to use on hardwood!). Moist heat and scraping with a putty knife and scrubbing pads do wonders. If you do have to get the wood wet, make sure it’s wet for as short of a time as possible – do small areas and try to do it quickly.
I have been trying for weeks to remove my sheet vinyl flooring that was installed in 1985. It was glued all across the floor. We have pulled up the top layer but what is left is all the backing and glue. I have tried a rented machine, a hot iron and wet rags and a steamer. Nothing has worked with any amount of ease. Yesterday I tried finger nail polish remover. IT WORKS LIKE A CHARM! Just poor some finger nail polish remover or anything that has a lot of acetyl in it. It scraps right up! Good luck.
Hi Ashley,
Thanks for sharing! For those who aren’t concerned with potentially harmful fumes, nail polish remover or another chemical remover may work very well.
I have started to remodel my grandfathers old home. I wanted to get as much done myself before I called in professional help. I pulled up old carpet in the bathroom along with what I assume was old cracked vinyl flooring. I was unaware that asbestos was used in this type of flooring before the 1970’s. Now I am afraid I may have disturbed asbestos. What should I do now?
Hi Samantha,
You should have the flooring tested for asbestos. You can get a kit from stores such as Home Depot, Lowe’s, etc. Do you have anything to cover it up with in the meanwhile? This may really not be necessary though so long as you haven’t moved in yet. Hopefully, the flooring isn’t as old as you think. ;o)
If it comes back positive for asbestos then you should either have a professional remove it. You can do it yourself, providing that you’ve read up on how to do it correctly to avoid possible harm to yourself. You’ll also need to dispose of it properly – it can’t just be thrown into the trash. Asbestos disposal is government regulated – you’ll have to find a disposal site that will accept it – there may be a fee involved for this. Sometimes it’s just easier to hire a professional since they are used to taking care of disposing asbestos materials legally.
PLEASE HELP!!!! I have found vinyl tiles under my carpet, they are old and probably date from the 70’s when our house was converted into flats. I realise this means they may well have asbestos in them/the adhesive. We want to lay wall to wall seagrass type flooring over them as can’t face trying to remove it all. Can we do this directly over the tiles? It looks like someone has taken bits of them up so the tiles are not complete and flat all over. Do we need to lay something over them first? If not, what and how without drilling into possible asbestos?? AGGHHHH!!!!!!!! :)
Hi Joey,
The only way to make flooring that contains asbestos safe (without removing) is to cover it. I don’t think seagrass flooring is going to do the trick as it doesn’t give solid coverage as would tile, wood, paint, sealer, etc. You can lay some cheap lino over the tiles, too if you’d like. As far as the little pieces that are missing, you can always use grout to fill them in. Seagrass carpeting wouldn’t act as barrier, so just the seagrass isn’t going to be enough.
Hi, That’s what I was getting at really, how/what can I cover it with first bearing in mind the missing bits? Could I use MDF sheeting and then seagrass or whatever over the top of that? How thick do you think it should be and how would be best to fix it down? Thanks :)
Hi Joey,
I wouldn’t advise using the MDF sheeting, mainly because particles could still become airborn from around the edges. The old flooring really, really needs to be removed or sealed. Actually when asbestos flooring has missing pieces, chipping, fraying, or cracking it is really supposed to be removed.
Hello again! So when you say sealed, what do you mean with? Thanks for all your advice :)
It can be sealed with poly, paint, etc. – just use grout or something to fill in the missing pieces so that it’s level. If you want to put a new subfloor over it, that’s good too. For removal instructions, see Removing Asbestos Vinyl Flooring.
Hello,
I have a house built in the 1990’s. I have vinly laid on a concrete slab in my kitchen. Is there any chance that the vinyl I have could contain asbestos? I am planning on laying ceramic tile in its place and need to remove it. Thanks,
ben
Hi Ben,
Chances are, your old flooring doesn’t contain asbestos. If you’re afraid that it might, just go to your local home improvement store and pick up one of those test kits – all you do is remove a very small piece of the flooring, mail it out and it will be tested for you and you’ll get the results – usually within 2 weeks. It’s a small price to pay for easing your mind.
Hi there! I want to remove 9-year-old cheap builder-grade vinyl flooring in my kitchen (I’m on slab). What do you think of staining or painting the concrete instead of laying down tile? I’ve seen the polished concrete look and some look great.
Hi Rebecca,
Please read this article “Concrete Flooring Ideas”
https://theflooringlady.com/concrete_flooring_ideas.html for suggestions and ideas for your concrete floor.
Is there a kit to tell if there’s asbestos under the flooring. There is 2 floors that I can tell. Thank you Karen