In This Post:Before You Install Carpet PadLeveling The Subfloor For Carpet Pad InstallationOption 1: Replace the Subfloor With New PlywoodOption 2: Pour a Layer of Self-Leveling Concrete as a Subfloor Option 3Fill in Cracks That are Wider Than 1/8 Inch With an Underlayment Leveling CompoundChoosing the Carpet PadInstalling Carpet in Five Easy StepsStep 1: Prepare the SubfloorStep 2: Install Tackless Strips Step 3: Lay Carpet PadStep 4: Trim the Excess Carpet PadStep 5: Secure the Carpet Pad to the Subfloor
Knowing the best way to install carpet pad doesn’t mean you will necessarily choose to do the job yourself; you may instead choose to supervise it.
But having the know-how under your belt, you can then hire qualified workers and know that they are doing a top-notch job installing both the new carpet and the padding.
If you do want to try to install the carpet pad yourself, however, look at these five easy steps and get an idea of just how easy the process can be!
The top rated tools for carpet installers are Roberts Carpet Tools.
Their professional quality but do-it-yourself pricing makes them a perfect companion for anyone installing carpet or carpet pads.
Laying carpet correctly is a big job, and more importantly, one that needs to be done correctly.
Part of the success of laying the carpet and what will help make the greatest difference in your overall satisfaction from your newly carpeted room comes down to not only selecting a quality carpet, but also using a quality carpet padding.
And, just as importantly, you will want to ensure that carpet pad is installed correctly, as many people fail to recognize the importance of how to install carpet pad.

Before You Install Carpet Pad
For new carpet to last, you have to invest in both a quality carpet that is durable and will hold up to the daily wear and tear and quality carpet padding, and you will need to install both correctly.
If you skimp on any one of those three steps, you may find yourself disappointed in your carpet.
A bad installation can cause carpet to look bad quickly, and wear out long before it should.
Here, we give you the overview on how to correctly install your quality carpet pad. Of course, you will want to get more detailed instructions from either the manufacturer, or potentially follow the steps listed in a how-to video such as this one:
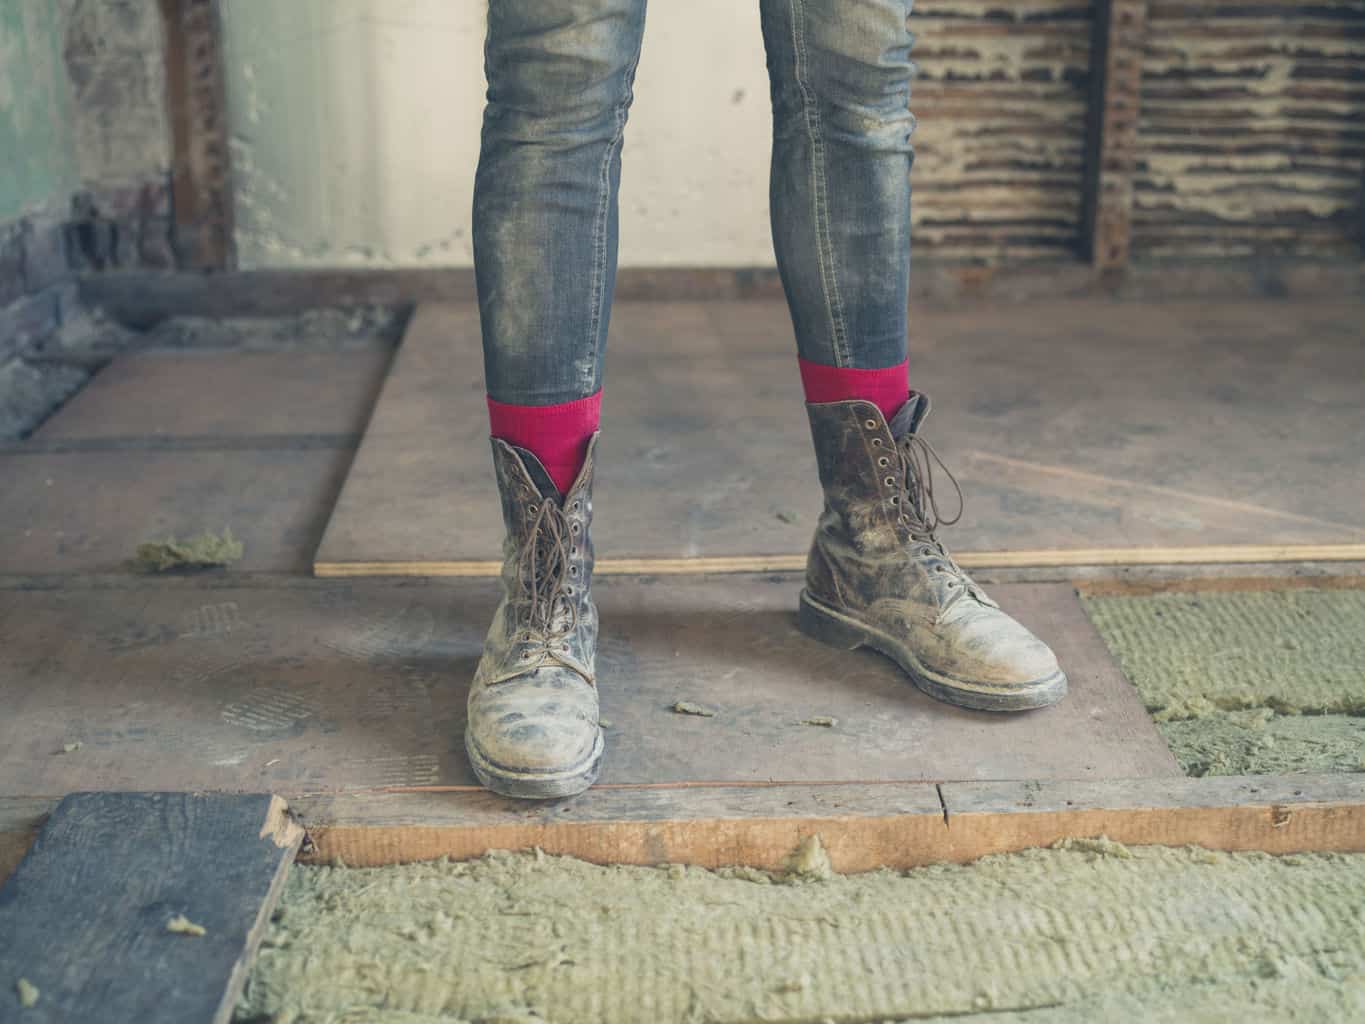
You will also want to ensure that your subflooring is even. Installing carpet pad or floating floors on an uneven subfloor will only cover up the problem temporarily.
A carpet pad installed over uneven subfloors will wear unevenly and quickly with the pressure from feet and furniture, causing the carpet and the padding to wear out much quicker.
You need to fix the uneven floors by using a leveling agent or putting down a new subfloor before you install your flooring to ensure that your investment in flooring will keep its value,
Leveling The Subfloor For Carpet Pad Installation
If you have pulled up existing flooring of any type to replace with new carpeting and you note that the subfloor underneath is uneven, there are a few different fixes you can consider, depending on the situation.
Option 1:
Replace the Subfloor With New Plywood
This is something you will want to do if the entire sub-flooring is uneven or damaged, or even if more than a few minor patches are.
You can replace just a portion of the plywood subfloor if, for example, there is only one area of about a few square feet that was damaged.
If the entire sub-floor looks as though it is uneven or is coming apart, it’s definitely better to front the initial cost of replacing the plywood subfloor now.
While it is an additional cost, it is a pretty minor investment that will definitely go a long way to protect the larger investment of your new flooring.

Option 2:
Pour a Layer of Self-Leveling Concrete as a Subfloor
This is a great way to get a solid, level subfloor. Of course, you can only pour a concrete subfloor if you are on a slab or in the basement or you are absolutely certain that your framing can carry the weight of a concrete subfloor.
Do not risk guessing here; have a licensed contractor come and give you the ok to pour concrete if you are not on ground level.
Concrete is very heavy, so do not pour concrete if your home has a crawl space unless you have been assured by a professional that the framing can handle the weight, or you will end up with major cracking as the house shifts and settles.
You will only need about ¼” of self-leveling concrete poured as a subfloor, and you should look for a lightweight option like Ardex brand.
Also, if your flooring had a plywood subfloor previously, know that you should not pour the concrete over wood, as it will not cure correctly. You will need a backer board or heavy plastic underneath the concrete.
Of course you will also need to seal the concrete to prevent moisture problems.
This video shows a really good example of how to lay a self-leveling underlayment of concrete:
Option 3
Fill in Cracks That are Wider Than 1/8 Inch With an Underlayment Leveling Compound
While you cannot simply cover your entire plywood subfloor with this, an underlayment leveling compound can be used to spot fix small areas of damage.
If you use a large amount of leveling compound on any type of unsound floor that is at all bouncy, it will break up over time and result in damage to your new floors.
Simply mix according to directions and smooth over cracks or gouges with a multipurpose trowel.
Choosing the Carpet Pad
Choosing a carpet pad is not as simple of a process as you may think.
Many people assume that thicker is better when it comes to carpet padding, and while you can see where this concept could have originated, it’s not actually true and choosing carpet padding that is either too thin OR even too thick can cause an issue with your carpet.
If the carpet padding is not thick enough, the carpet will be uncomfortable and will wear to quickly, as the carpet will end up having to absorb too much of the impact between foot traffic and the subflooring.
Should you choose carpet padding that is too thick for your particular carpet, it may not adhere to the tackles strip well and will peel up and separate from the floor.
The general recommendation is no thicker than ½ inch carpet pad is needed in a residential space, and that carpet padding for a commercial carpet or very low pile Berber carpet should be closer to 3/8 inch thick.
However, you should check with the recommendations of the manufacturer or supplier of your particular carpet before purchasing a carpet pad.

Additionally, carpet padding can be made from a variety of materials. Waffle padding was once the most common, and as the name implies, this has pockets of air built into the design.
When purchasing a waffle pad to go under carpet, it is a good idea to purchase denser padding, as this older style padding was known to have too much filler and therefore break down quicker and cease to provide sufficient friction absorption in the long term.
Bonded urethane carpet pads are the most popular on the market today, but are losing favor among consumers due to the use of a chemical compound in the manufacturing known as Bht.
Other carpet padding options include flat rubber, urethane foam, or fiber cushion, which vary in quality and performance, but can be very viable options when purchased from a reputable distributer.
The bottom line when choosing a carpet pad is the same as when selecting your carpet: make sure that you gather as much information as possible on your options and do lots of comparison shopping.
Be sure to get customer reviews on your different options and remember that sometimes, the best deal will end up costing you more in the long run.
So, you have purchased the carpet pad and carpet for the space needed in your home.
It’s now time to begin the installation! Believe it or not, the carpet pad installation can be accomplished in a single afternoon and in five simple steps.
Installing Carpet in Five Easy Steps
Step 1: Prepare the Subfloor
First, prepare your floors.
Clean the subfloor (whatever surface you will be laying your carpet on top of) of dust, dirt, debris, old adhesive and paint spots so that the pad doesn’t get dirty, which will affect the carpet too.
Carpet can be installed over almost any surface — Cement, wood, linoleum, vinyl or even stone if you so choose, with the proper preparation. Starting with a clean base is the key here.
No matter what high quality carpet you have purchased, if the subflooring is not set up properly, it will have a direct impact on the feel and longevity of the carpet.
It is as simple as that.

Step 2: Install Tackless Strips
Once the floor is clean it’s time to install tack strips (usually referred to as tackles strips). Tackless strips vary in sizes (width, thickness, and length), so you should confirm that you are using the right size as recommended by the carpet supplier.
The tack strip will be laid around the perimeter of the room, except in front of doorways, being nailed at about 8-12 inch intervals.
The tack strips should not be placed in doorways, as they can wear through the carpet over time and could be dangerous if repeatedly walked over.
The pins should point toward the walls about 1/4-1/2 inch between the wall and the strips. Nail the tack strips to the sub floor so you have something to attach the carpeting to.
If you have masonry floors (such as cement or concrete), then the tackless strips should be glued down with an epoxy to install the carpeting.
Though masonry nails could be an option in this case, special adhesives have grown much more in popularity due to both their ease of use and effectiveness.
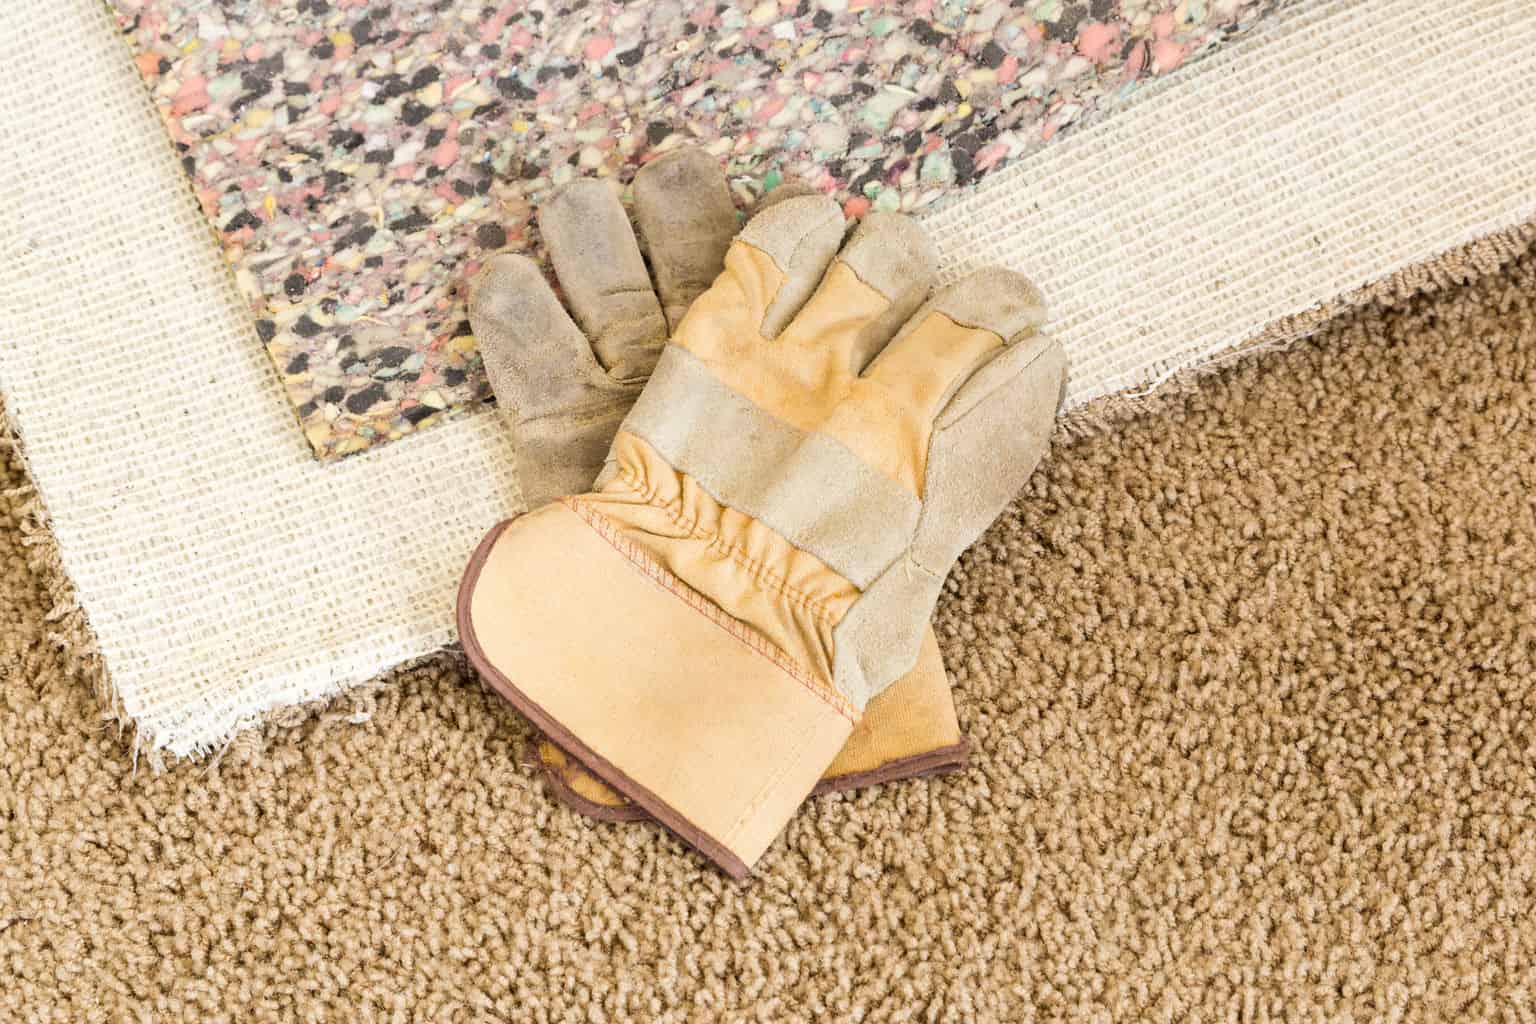
Step 3: Lay Carpet Pad
Now it is time to install the carpet pad. Laying the carpet padding is an important part of the carpeting installation process, not only because it can make the carpeting feel more comfortable, but it will also have an impact on the durability of the carpet.
If using the waffle pad style of carpet pad, the “waffle side” of the carpeting pad should be face up for maximum cushioning and it is cut to fit inside the tackless strips with about ¼” gap so that the carpet itself can be attached to the tackless strips and the padding does not interfere with the securing of the carpet.
Lay the carpet pad perpendicular to the direction you plan to lay the carpet.
Step 4: Trim the Excess Carpet Pad
Cut the carpet pad to roughly the right size and then trim the pad to be just short of the tack strip.
A carpet trimmer can make the job much easier and neater, but any sharp blade will do the trick.
You want to have the padding away from the tack strip a little so that when you stretch the carpet the padding doesn’t ride up onto the tack strip, interfering with proper carpet installation.
Carpet padding pieces should be butted together, as you lay them down, rather than laid on top of each other for maximum durability and comfort. Tape or staple any seams together to keep the padding from creeping or shifting under the carpet.

Step 5: Secure the Carpet Pad to the Subfloor
The padding can be either stapled or glued directly to the subfloor. If you choose to staple the padding to the subfloor, stale it every six inches.
A tacker can make this process much quicker and more efficient, but a regular staple gun will do the trick if you don’t have access to a tacker.
If you are choosing to glue the carpet pad to the subfloor, as you would especially want to do on cement, select a low VOC (volatile organic compound) adhesive so you don’t pollute your indoor air and be sure the area is well ventilated.
Be sure to collect any scraps of carpet pad or other extraneous items or trash that any blend into the carpet pad before installing the carpet over top, as these can cause bumps or bubbles in the carpet after the final installation (imagine a Princess and the Pea scenario, where you can feel the additional bubble through the carpet as long as it is in place).

By following the five simple steps above, you can install carpet padding yourself and ensure that the padding and carpet will remain in optimum condition for the maximum amount of time.
A professional carpet installer would also follow exactly these five steps when installing carpet pad. If you still do not feel confident to tackle this home improvement project alone, start by attempting the installation it in a small area.
Once you get the hang of laying carpet padding, you will see laying carpet padding even in an entire home is a simple five step process.
If you do choose to hire a professional, use the above steps as your guide to monitor the installation process of your carpet.
I found the article helpful. I was wondering, if once the carpet is in place,should there always be a crunch sound around the whole border of the room? I had carpet installed four months ago and it seems to keep pulling up around a certain corner even if they keep stretching it. The edges crackle when you step on them.I was told this could mean the tack strips are not right.
Crackling Carpet; that may be the newest in flooring options! And juts think, you were the first to report it.
No, carpet edges shouldn’t crackle when you walk on them, and the carpet shouldn’t keep pulling up either. I’d agree with the proposal the carpet strips are a part of the problem. Or, the padding could be covering the tacks so the carpet isn’t being held.
The crackling puzzles me. Again, it could be the padding on the tack strips and crackling as you step on them, though I’d think it would be hard to walk where there are tack strips.
There could be a problem with the seaming too. The tape that holds the edges together could be brittle and crackle, though I’ve personally not heard of that before. The seaming could have been done at too high a heat, melting the fibers rather than fusing them (a difference of degree).
If your flooring installer can’t seem to give you answers you are content with, is it worth bringing someone else in to give you an opinion?
Good luck. And report back what you find.
I had a new carpet installed over concrete flooring. Was he supposed to GLUE before putting down the padding??
The padding needs to be attached to the concrete in some fashion so it doesn’t move around underneath the carpet. An adhesive around the edges is one way, though it may not do enough to keep the padding from moving. Or adhesive underneath the entire length of padding strips will keep the padding from moving.
What did he do?
Am I supposed to install tack strip at the edges of doorways? I know not to put it across the doorway, but what about at either end of the door opening; the 4 or 5 inches that make up the thickness of the walls.
I’ve seen tack strips used in the doorway, along the framing, and I’ve seen it not used there too. You want to hold the carpet down so it’s not shifting with time and use. Doorways are busy areas so need support for the carpet.
I stappled the 1/2 padding around the wall area of the room. The floor is old tounge and grovve.
Do i need to staple in the field area?
What would be the spacing and how long of a stapple should be used?
thank you don
Why did you staple it? (see article above)
We just installed tile in our previously-carpeted bathroom. Now I’m looking for a litle help in how to secure the carpet edge from the hallway (which we cut when we removed the bathroom carpet) to the new tile edge. This is in a doorway. Do you have any advice? Thanks.
Hi Tammy,
All you need is a threshold strip – there are different kinds for different needs. It depends on if the two areas are level with each other. If you go to your local Lowe’s, Home Depot, etc., they’ll be able to fix you right up. They come in a variety of widths and materials (wood, metal, etc.), so try to get an idea of how wide you want it to be and what color or material. Be sure to tell whoever helps you that it’s for adjoining areas that are ceramic & carpet. Make sure to measure the difference in the height of the floors (without the carpet) if applicable.
I’m getting ready to replace carpet in a room that has had little traffic. Is new padding required? Can the tack strips be reused?
Hi Wendy,
Maybe and maybe……… depends on what condition the carpet pad is in. If it’s still holding together well and springs back after stepping on it, it might be ok. Really hard for me to tell you for sure since I can’t see & feel it. As a general rule though, it’s usually a good idea to replace the carpet pad, unless the old carpeting is relatively new. (like a couple years old)
Tack strips can be reused so long as the tacks aren’t bent over.
Good luck!
I, in the process of replacing just about every floor in my house. I installed hardwood in some areas tile in others and some areas with carpet. My question is, the hardwood is 3/4″ and the tile with new subfloor is about 1/2″, I was thinking it would be a good idea to lay down a layer of 1/4″ subfloor on the areas that will be carpeted to help with the floor height but Im not sure if in the end with carpet installed it’ll end up being the height I expect it to be. Any advice? How high is carpet after its installed?
Hi Kevin,
It’s always a good idea to have the floors an equal height before hand. So, yep, probably a good idea to put down that 1/4″ subfloor. ;~) Kudos to you for using your noggin.
Hi, my name is Alecia, I was curious on what you would put in between doorways because I have tiles in my kitchen and I am about to get carpet in my living room. What would I do to divide the two different floorings? Do you have any suggestions? Thank you.
Hi Alicia,
You’d need something along the lines of a piece of t-molding or a reducer. It depends on if the floors of the two rooms are the same height or not. If you go to your local home improvement store and already know which one you’d need, they’ll be able to help you.
I just bought a carpet padding, high grade, with an odor eater film attached to one side. The pad is 1/2 inch, the film is blue. Which side goes down?
Hi Kim,
If it’s Carpenter Co.’s Odor-Eaters Carpet Cushion System then the film goes on the top.
From their website: “The system combines two bonded cushions with a spill-proof laminate film that prevents liquids from saturating the cushion where they can harbor odors and damage the subfloor. The laminate is treated to release natural enzymes that eliminate odors. The second part of the system is Odor-Eaters Odor and Stain Remover for Carpet, sold in a 32-oz. spray bottle. It treats spills at the top of the surface that don’t penetrate the carpet backing. An easy way to quickly clean spills and keep your carpet looking beautiful.”
I have concrete floors and driving a masonry nail in is next to impossible for me. What can I use to hold the threshold strip to the floor that will hold the carpet at a doorway?
Hi Amy,
You could try using some sort of flooring adhesive. Do you have anybody who can nail the threshold strip for you?