Vinyl plank flooring is known to be a relatively easy material to work with.
At the same time, it is often confused with laminate flowing since they look very similar. If you're looking at high-end materials, it can be even harder to tell which is which.
If you are confused about this, this guide is about to clear the air.
We'll share with you information on what separates the two floorings and also highlight the benefits of using vinyl over laminate.
This article contains everything you need to know about what vinyl flooring, including what it is made from as well as advice on cutting vinyl plank flooring and installing it over a wide variety of subfloor surfaces.
What Is Vinyl Plank Flooring?

Vinyl plank flooring is a plastic product. Unlike laminate which is mostly wood, vinyl has better moisture resistance. It's also less natural looking and not as firm as wooden flooring.
However, high-end vinyl often closes the gap in aesthetics (and of course the price gap too).
It is often used in damp spaces or around the whole house if you want to redecorate on a tight budget.
Its ability to withstand moisture combined with its much more affordable price can often make people choose it over laminated wood flooring.
Benefits and Drawbacks of Vinyl Plank Flooring
Vinyl plank flooring is quite different from your regular hardwood and laminate flooring. It is sometimes preferred over tiles too, especially in the kitchen.
Here are the pros and cons of using vinyl plank flooring in your home.
Pros
Antistatic
Can be used on a variety of subfloors
Can be glued
Affordable
100% resistant to moisture
Reinforced with fiberglass
Easy to work with
Cons
Doesn't look as good as wood or laminate flooring
Not biodegradable
Hard to remove once glued
Easily punctured
The water resistance feature is its trademark. This is what makes it such a great fit for kitchens, bathrooms, and even basements if you want to cover up the concrete with something durable. It also gets its durability from layers of fiberglass reinforcement.
Although it's not the prettiest choice for flooring, it is the most versatile. You can use it in any room of the house without worrying about humidity or heat levels. You can also install it on any type of subfloor, including:
Concrete
Tiles
Hardwood
Plywood
Laminate flooring
Vinyl plank flooring (there could be some issues here)
The harder the subfloor is, the better the vinyl flooring will look once evened out and glued down. The few drawbacks don't really take anything away from it, especially when you also consider how cheap it is and how easy it is to work with.
Vinyl plank flooring certainly makes for the best and easiest DIY flooring project as long as you have three simple tools, which are listed in the next section.
Cutting Vinyl Plank Flooring

Cutting vinyl plank flooring is one of the simplest things a homeowner can do. It doesn't require professional-grade tools or home improvement expertise of any kind. You just need to be able to take accurate measurements and have a few tools on hand.
Tools
Concave knife
Gloves
Pen/pencil
Optional
Workbench
Pliers
Self-leveler
Sander
Prep Work
Before cutting vinyl plank flooring you need to prep your subfloor, just as you would any other type of flooring.
Just because vinyl planks are 100% moisture resistant doesn't mean you'll get an even surface if the subfloor is not dry.
Sand down the high spots whenever you need to. If not, use a self-leveler to get an even and flat surface to lay your new vinyl plank flooring.
Also, check the condition of your walls. Some of them may have angles or small bows which could throw off your measurements.
Try to put moldings as straight as possible while also leaving a bit of room for an expansion gap.
The Process

Safety gloves are more important than you think. Not only can they prevent your hands from staining the vinyl planks or ruining the cut line, they should also give you a proper grip. That's always important when working with a sharp knife.
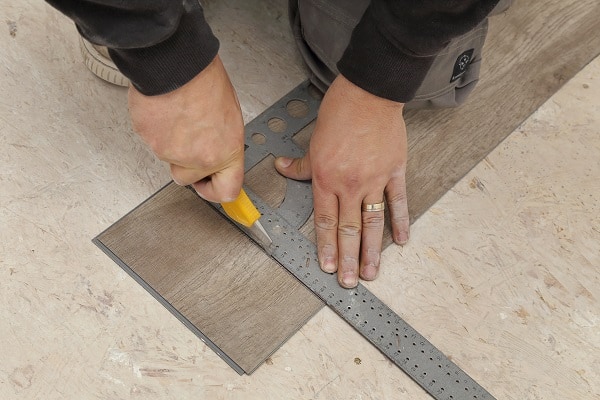
After you've taken all the room's measurements, you can proceed to draw cut lines and shapes using the pen.
You can use another vinyl plank as your guide if you don't have a workbench or a ruler. A workbench would make things much smoother but it's not necessary.
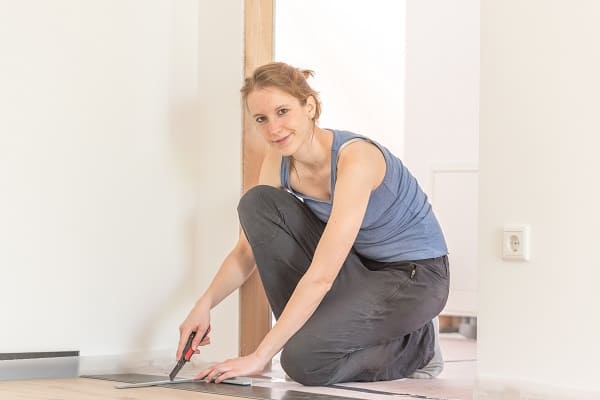
When you cut with the concave knife, you don't have to apply a huge amount of pressure.
Vinyl planks are easily punctured. If you're doing this on the floor, you might want to use three planks in total for each cut.
Bottom plank
This will serve as the cutting board. Keep it upside down. You won't need this if you have a workbench.Middle plank
This is the plank you're actually carving into. Because you already have another plank between this one and the floor/subfloor, you can avoid any damage underneath.Top plank
The last plank will act as your pen guide and knife guide. You will need it if you want to be sure that every cutout will fit perfectly with the next ones.
Breaking Parts
Once you've made your cut, don't be tempted to drive the knife even further through.
All you have to do now to separate the two pieces of cutout is to break them with your hands.
Apply pressure underneath the cut or alternate by flipping the sides up and down.
It doesn't take long and you're left with two pieces, perfectly cut.
Tips
Here are some additional tips on what to do and what to avoid when cutting vinyl plank flooring while installing new vinyl flooring:
Don't use regular knives. The concave cutter knife is your best option here. It is sharper than regular kitchen knives, army knives and regular cutter knives. Also, remember that vinyl planks aren't that hard so you should have a strong knife for pushing down into the planks.
Using a workbench is not necessary. You might want to use at least an end table as a support when breaking off sectioned pieces. You get better leverage and a cleaner cut, especially for long planks.
If you're cutting a design or you just need a tiny piece removed from a plank, don't use your fingers. Instead use a pair of pliers or anything similar that gives you a firm hold over a small surface area.
Your concave knife should go perpendicularly into the cutting plank. If you cut at an angle, you may find it difficult to fit it to adjacent pieces. Trimming off a slanted edge can be done with a concave knife but this requires very steady hands and a high-end knife which not everyone has access to.
Some vinyl flooring planks come with inserts at the top and bottom edges. It is possible that those inserts will fall out after a cut. Make sure that you check each plank before installing it and refit the missing inserts before gluing the plank to the subfloor.
Although installing vinyl plank flooring on tiles is easy, it's not always advised. If your tile subfloor is not perfect, the vinyl will shake loose in areas of high foot traffic.
When installing vinyl on vinyl, make sure that the old floor is thick enough so that the new one will be as flat as possible.
For vinyl-on-vinyl installations, never sand the vinyl subfloor as it may contain asbestos. You're better off using a self-leveler, which is quite similar to concrete. Just remember that it dries quickly so you should apply it fast.
When installing a whole plank into another, put the ends together at an angle. Come down to about 45 degrees with the new plank and slide it into the connecting plank. Keep applying pressure while also lowering it. If all goes well you should hear a click from the inserts fitting into place.
Don't use vinyl flooring around bathroom drains. You should still use porcelain tiles even if it makes the budget calculations harder.
Make sure that you even out the adhesive before pressing down the planks. If you want to use both the lock and snap mechanism and glue, it is sometimes best to apply adhesive to the subfloor instead of the planks.
Final Verdict
Cutting vinyl plank flooring has to be one of the easiest DIY projects you can ever take up.
You don't need expensive tools, there's no difficult measuring involved, and you don't need superior physical strength.
On top of all that, today's vinyl flooring looks nothing like the boring planks of the past.
High-end flooring looks a lot more like laminate flooring, so it should make a more significant contribution to the aesthetics of the house.
Not only do you need only a few tools, you won't have to pay much for vinyl either. High-end vinyl is cheaper than some mid-range laminate flooring, and that says a lot.
