Are you remodeling your home? Removing mortar from concrete slab floor can be tricky.
But, if you pull up old tiles, it may be something you will have to contend with.
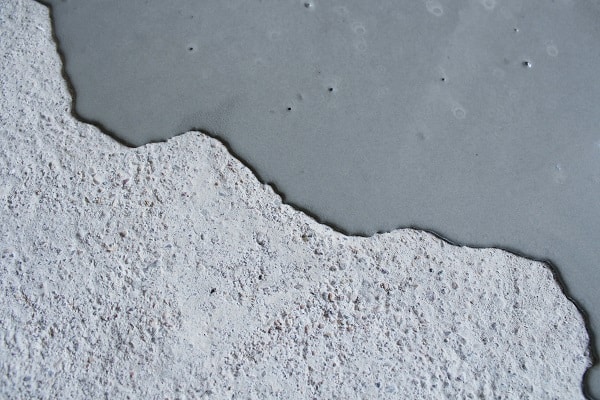
Mortar is a cement-based paste that is used for binding building materials like bricks, tiles, and stones.
And, it's great for creating durable surfaces. Yet, when you need to remove it, it can be a nightmare.
If this sounds like you, keep reading.
Here is a step-by-step guide for removing unsightly mortar from concrete.
So, you can get back to creating a new look for your home.
Mortar Defined: Why Is It So Difficult to Remove?

Why is it so hard to remove mortar? Mortar is meant to last for a very long time. Made from a mixture of sand, water, and cement, it's used to join building blocks or fill gaps between many types of stone and brick surfaces.
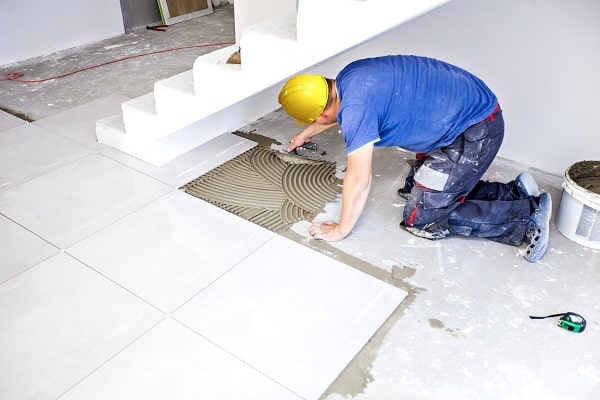
Additionally, a variation called Thinset is a thinner, modern variation of the paste. And, it's used to set tile in modern masonry work. But, it may be just as difficult to remove.
Whether you are removing Thinset mortar or traditional mortar, both are challenging to take off. This is because it's cement-based so it dries like cement. But, it is possible to remove it.
Mortar Removal Guide
You can remove mortar in a couple of ways. You may take off small pieces. Or, just sand them down. The one that is right for you depends on a few variables, though.
It may be feasible to get under mortar pieces and pop them off if you are only working a small area. Or, if there isn't much mortar to remove. But, if you are working a large area you may want to consider sanding it down instead.
Removing mortar from concrete slab floor can be frustrating. But, here are a few solutions you may try. And, some work better than others, depending on the thickness of the mortar and the size of the area.
Mortar and Thinset Removal

Step One - Protection
First, protect everything. At the minimum, you should have protective eyewear because mortar chips and dust will fly around.
Additionally, cleaning up mortar throws up a lot of dust. Use a respirator or dust mask. Also, consider using earplugs when it's time to use power tools.
Lastly, protect the surrounding areas. Lay down plastic sheeting so that you don't have to clean out dust particles later.
Step Two - Hammer and Chisel
Next, using a chisel with a wide set blade and a hammer, remove as much mortar as possible. This may be time-consuming, but you may be able to remove all the mortar without moving to the next step.
Step Three - Chipping Hammer with Scraper
Some Thinset mortar can be removed by using a chipping hammer with a scraper attachment. Use short jabbing motions to get under the mortar and pop it from the floor. But, if the mortar is stubborn, you may have to go directly to the big tools.
Step Four - Angle Grinder with Diamond Cup
If the first couple of steps haven't removed your stubborn mortar, it may be time to get your hands on serious power tools. So, get an angle grinder and a diamond cup grinder wheel.
These grinders are relatively inexpensive. So, you don't have to worry about breaking the bank. Otherwise, you may be able to borrow or rent one.
Be advised, though, that this method will produce an enormous amount of dust. This is because you will be sanding down the mortar instead of popping it off the concrete. You will need to make sure everything is covered. Or, use a Shop Vac to pick up stray dust.
Also, you can use a water spray bottle and lightly dampen the area to minimize the amount of dust kicked up. But, make sure that you don't get water on the grinder motor.
Additionally, this is a handheld power tool. So, if you are doing a large area this may not be ideal. However, you may also want to break up sessions to minimize physical stress to your body.
Step Five - Floor Maintainer
Is your mortar stubborn? It may be time to break out the big guns. Use a floor maintainer with a diamond-cup grinder. If you don't have one laying around, you may be able to rent one at a home improvement store.
These can be big. And, they are expensive. You may be able to obtain a smaller handheld variety. But, most likely you will use one the size of a push lawnmower.
This method also sands down the mortar. So, it will create a lot of dust. Prepare your area prior to starting.
Lay down plastic sheeting and remove furniture. Also, you may want to cover the entryway to the room with plastic sheeting. This may help minimize the amount of dust that finds its way into other rooms.
The Cleanup

Now that you've finally got all that mortar off your concrete floor, it's time to clean up. If you put down protective plastic sheeting, this may be easier.
1. Remove Large Pieces
First, remove large pieces of mortar and other debris. Using small buckets may minimize the amount of walking back and forth to your dump pile.
2. Use an Outside Broom
Next, use an outside broom to sweep up dust and smaller debris. These brooms have very stiff bristles. So, they may pick up more than your typical kitchen broom.
4. Use an Inside Broom
Now, it's time to use that inside broom. The soft bristles will pick up finer dust particles. And, it's a good way to make sure that most of the loose debris gets cleaned off the floor.
5. Shop Vacuum Remaining Dust
Also, after you've swept up everything you possibly can, use your shop vacuum. You may be able to remove dust from those hard-to-reach cracks and crevices.
6. Mop The Floor
Lastly, it's time to mop the floor. Why? This last step will ensure that you won't find mortar dust months from now.
Other Considerations
There is not a universal way to remove mortar. So, start off small before going for power tools. You may not even need them.
Always wear protective gear. Especially when using a power tool method. This will help prevent dust and debris from getting in your eyes and lungs.
Sanding with a power tool will create a lot more dust than using a chisel and hammer. Prepare your area accordingly. Lay down plastic sheeting on your walls. And, remove objects and furniture if possible.
Final Thoughts
Look up "removing mortar from concrete slab floor" online and you will find a variety of options. This is because there is no "one way" to go about this. And, even professional contractors try different methods depending on the situation.
However, a general rule of thumb to follow is: start off small. Use manual labor methods first. Especially if you are working a small are or there are only a few mortar pieces to pop off.
But, don't spend days breaking your back with a hammer and chisel. Remove loose pieces and move on to sanding with an angle grinder or floor maintainer as needed. And, remember that power tools kick up a lot of dust.
With a bit of muscle and a lot of clean-up, you will finally have a smooth level floor. And, you will have the peace of mind knowing you saved money doing it yourself.

This is a great information.
Am a professional cleaning and this article has really helped me. Thanks for this..
If you want to remove tiles from concrete floor without hammer and chisel, can you use dry ice, or freezing tiles? DOE Labs were first to use. I dont know if it is Commercialized