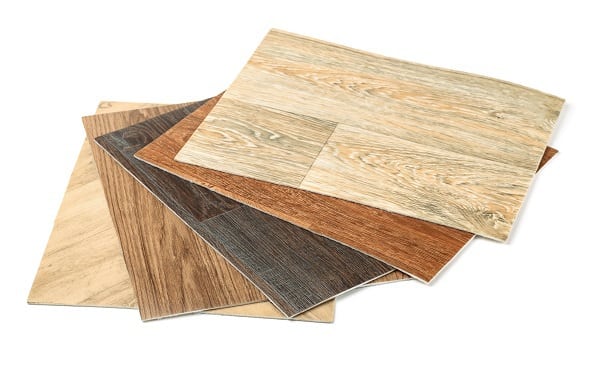
If you've noticed moisture appearing on the concrete in your basement or have some bare concrete in your home you'd like to cover easily and cheaply, vinyl plank flooring could be the thing you are looking for.
There are a number of vinyl plank flooring options.
What's more, installing them is something you can easily do on your own.
So, before you get started, take a look at our guide on how to install vinyl plank flooring on concrete.
Things to Know Before You Start
If you have some experience with installing flooring or are DIY hobbyist, it shouldn't take you more than a day to install vinyl plank flooring on concrete. It is one of the cheapest solutions, and at the time of writing it could set you back just a few hundred bucks, depending on the size of the area you are covering.
Should You Use a Subfloor Beneath Vinyl Plank Flooring?

A subfloor is the bottom layer of any floor. It can be constructed from wood, plywood, plastic or concrete. So technically, if you are installing vinyl plank flooring onto concrete you already have a subfloor. However, some people prefer to add another thin layer of subflooring between the concrete and vinyl.
This additional layer can improve insulation and should make your vinyl plank flooring warmer and less resonant. The extra layer can even out any minor imperfections in the concrete or level it out if the concrete drops or sinks in some areas. It may be applicable if your concrete is too old or too damaged.
However, you don't need to add the extra subfloor layer. The important thing is that the concrete is smooth, free of damages, clean and dust free.
Guide on How to Install Vinyl Plank Flooring on Concrete
Prepare the Concrete
The concrete should be more than six weeks old. There shouldn't be any powder or flakes. If there are large expansion joints or cracks in your concrete, you can fill and smooth them using premixed leveling products from home improvement stores.
Make sure the concrete is dry and avoid self-leveling patches. For the purpose of installing vinyl plank flooring, the concrete does not have to be perfectly level, only smooth.
Choose the Type of Vinyl Plank Flooring
There are four different types of vinyl plank flooring that you can find on the market. Although the installation is quite similar you should choose the one that best fits your needs and level of expertise.
WPC Vinyl Plank Flooring
This is the newest product in the market. WPC stands for wood plastic composite and itâs a fraction thicker than the others. It can be installed with an underlayment, and some WPC vinyl plank floors come with a cork underlayment pre-attached.
Loose Lay Vinyl Plank Flooring
No glue or locking system is required to install loose lay vinyl plank flooring. Also, there is no need to leave expansion gaps or put in an underlayment. It should fit snugly against your wall. This is why it is the easiest to install.
Click Lock Vinyl Plank Flooring
Installing click lock vinyl plank flooring is very similar to laminate flooring. The thinner construction of this type of vinyl plank should be taken into account if you are planning to add a foam underlayment. The underlayment may affect the locking mechanism, so ideally click lock vinyl plank flooring should be installed directly onto the subfloor.
Glue Down Vinyl Plank Flooring
The name speaks for itself. You glue down the planks directly onto the subfloor. If your subfloor is not perfect or has some slopes, you shouldn't worry because you are gluing down the planks. The important thing is for your subfloor to be free of any debris.
Perform the Installation

Once you have prepared the concrete subfloor and chosen the type of vinyl plank floor, it's installation time. However, you may be wondering how to install vinyl plank flooring on concrete without making any mistakes. Take a look at our step-by-step guide:
You should start and end the installation with a half plank or more. The first and last row should contain pieces that are much smaller than half a plank. To make the smallest number of cuts, start at a point perpendicular to the longest wall.
Undercutting the doorjambs and casing helps you slide the vinyl plank flooring underneath. You can use a small pull saw or oscillating multi-tool. Use a scrap piece of plank as a guide for the proper height.
Create expansion gaps by inserting shims along the walls. The gaps between the wall and the flooring should be ¼ in. or 3/8 in. They allow the vinyl plank flooring to adjust to temperature changes and will allow some leeway for the contraction and expansion of the house.
Snap the planks in place. You need to connect the end of a plank to the previous one first. Then go along the side of the plank so it snaps into the previous plank. The first row of planks is snapped end-to-end. When you start the second row, the tongue of the first plank in the second row slides into the groove of the first row at a low angle. Then you lay it on the floor and work your way down the room.
The piece of plank left over from the first row should be used at the beginning of the second row. Each consecutive row can start like this. Also, you will need to stagger the seams by 6 inches and avoid starting a row with a plank that is less than 6 inches wide.
The seams of the vinyl floor should be invisible and smooth. Some planks may need additional wiggling and pushing before they snap into place. This is where the pull bar or tapping block comes in handy. You should tap gently and protect the planks to avoid marring the edges.
You should install shoe molding once the vinyl plank flooring is down. It covers the gap between the base of the trim and the flooring. Nails go into the base trim and the shoe, but don't pin down the flooring. The molding should be finished to match the trim and not the flooring.
Tools Needed

It is very helpful to know what tools are required for this job. This will save you time and make the entire process much easier. Here is a list of tools required:
Air compressor and hose
Utility and putty knife
Tape measure
Hearing protection, safety glasses and dust mask
Straightedge
Sanding block
Knee pads
Belt sander and nail gun
Cold chisel and hammer
Square and chalk line
Aviation snips
Wrapping Up
The steps in this guide on how to install vinyl plank flooring on concrete are quite easy to follow. If you don't have all the tools or you want to be 100% sure you don't waste any material, invite a friend over to help you. Also, it is important to take time and prepare well before you start assembling.
Prepare the subfloor and measure out all the walls to know where to start. This can save you a lot of time and trouble down the line. You may not need all the tools and safety gear on the list, but they are advisable to prevent you from getting hurt or destroying the planks.
Fun facts: Every wondered about the history of vinyl flooring? Read all about it here.
