Have you ever installed a vinyl floor and realized that it is so dirty that you can't even enjoy its design?
This usually happens because of the grout that is left over from the installation.
People who don't know how to properly clean grout haze tend to start scrubbing the floor, which may not always give good results.
If you are one of those people, make sure to keep reading and discover how to remove grout haze from a vinyl floor in a few simple steps.
What Is Grout Haze?
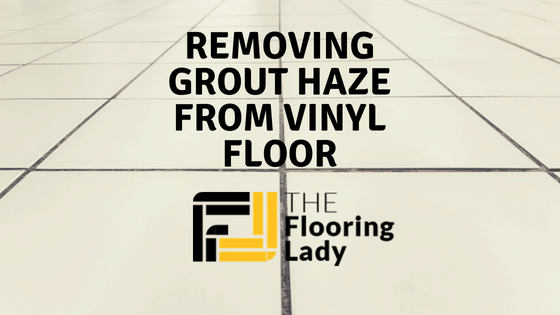
To put it simply, grout haze is a result of excess and leftover grout that is used to fill gaps in vinyl planks. It is not typical dirt, which is why you can't remove it with a few quick scrubs. You can easily recognize it as it is milky white, as opposed to regular dirt. Usually, the removal process requires time and energy. However, after you're finished with it, your floor will look very clean and fresh.
Although grout haze appears after installing different tile floorings, this article will focus specifically on vinyl floors. Vinyl is one of the most practical floors, as it is easy to maintain, moisture resistant, durable and economical. It has a rather unique look which makes it even more important to keep it clean from any haze.
Because it is very strong and long-lasting, people like to use it in kitchens. Rooms like kitchens or bathrooms require a high level of hygiene and the last thing you need is to have your floor looking dirty. Additionally, you won't even be able to enjoy its looks if there's a large amount of grout haze.
Removing Grout Haze from Vinyl Floor Step by Step

Removing grout haze isn't the same as regular cleaning. There are a lot of products that you can use, and we'll show you two simple and effective ways to clean your floors. Here is what you need to do.
Start on Time
This is not a step that requires a lot of work, but it is a very important one. The best time to address the problem of haze is between 1 and 10 days after the floor installation. If you wait longer than 10 days, the grout haze will stick to the floor, making it very hard to remove.
Use a Dry Sponge to Scrub the Floor
It is very important that you use a dry sponge. You want to scrub each area of the floor to completely remove the haze. Try to be very thorough with the scrubbing. Grout haze can be quite hard to remove, so you want to cover each section carefully.
The reason why you shouldn't use water or other liquids is that they will make the haze stick to the surface even more. Basically, you'll try to remove the haze, yet you will do the opposite thing.
A sponge is the best choice because it is rough enough to remove the haze but it won't damage your floor. Vinyl is prone to scratches and its look changes over time. You don't want to damage it in any way, especially right after you install it. The good news is that vinyl is very practical. If you end up scratching it, you can simply replace the damaged tile with a new one.
Vacuum the Floor
As a result of scrubbing, you will end up with a lot of dirt that you need to remove. The best way to do it is simply by vacuuming your floor. Again, be very patient and go over your floor multiple times. The haze will be dry, so vacuuming will give good results quickly.
Use Water or Wet Wipes to Finish Up
This is the time when you can get your floor wet. Since most of the haze will be gone already, you won't cause a lot of damage by using water. You can get a bucket of warm water and start cleaning the remaining grout haze from the floor.
Some people even like to use wet wipes. You get the same effect, but you have more control. Wet wipes can enter into the smallest cracks. With them, you can be very precise. Have in mind that you will, for sure, need more time if you choose wet wipes. However, the overall results may be better.
If you use warm water, you can add natural soap to it for better results. Vinyl is moisture resistant, so you won't damage it by making it wet.
Once you do all of these things, your floor will most likely resume a nice, clean look without any grout haze.
Alternative Way for Removing Grout Haze from Vinyl Floor
That's one way of removing grout haze from your vinyl floor. It requires almost no additional material, so you can save some money doing it that way. However, it may not be the quickest option, especially if you have a big floor to clean.
One alternative is to use cleaning products that are designed to remove grout haze. There are numerous options for you to choose from. If you decide to take this path, make sure to get the products that work well on vinyl floors. Most manufacturers will be able to inform you about this.
How Do You Remove Grout Haze with Cleaning Products?

Prepare the Floor for Cleaning
When you buy vinyl floor, you will most likely receive instructions on how to clean it. Use those to remove some part of the haze and prepare it for wiping.
Mix Grout Haze Clean-up Product with Water
Each cleaning product will have detailed instructions. Use them to determine the amount of water and product that you need. Afterward, take a grout sponge and wet it with the solution. You can also use a terry cloth towel instead of a sponge.
Start Wiping Diagonally
You will get the best results if you start wiping diagonally across the tiles. Be prepared that you won't remove all of the haze after a single wipe. Normally, you will have to repeat three or four times, depending on the amount of haze and floor length.
Use Plain Water to Remove the Cleaning Product
The last step involves using a sponge or a towel that is soaked in water only. Its purpose is to remove both the remaining haze as well as the cleaning product. Repeat several times if necessary.
What Happens after You Remove Grout Haze?
Your vinyl floor will get a very nice look once you remove all of the haze from it. If the vinyl floor is in your kitchen, you'll want to maintain high levels of hygiene. Having your floor covered with a ton of grout haze doesn't help with hygiene.
Luckily, grout haze is an issue only after you install the floor. Unless you replace a number of tiles, you won't have to repeat the process more than once.
The Bottom Line
Vinyl floor is made of a number of tiles which means that there will be some leftover haze for you to remove. Removing grout haze from a vinyl floor can be quite hard and time-consuming.
You may choose all-natural products or use a cleaning product specially designed for removing grout haze. Regardless of which, once you finish removing it, your floor will look amazing. More importantly, in most cases, you won't have to repeat the process again.
I recently installed stainmaster LVT peel and stick tile. I grouted it as well. I followed all of the recommendations for removing the grout haze. My tile still has a film of something on it. It looks like scratches, but it’s the top layer of what may be grout haze. I have mopped with hot water, vinegar/water, stainmaster floor cleaner and it’s still there. I am so frustrated. Please help!